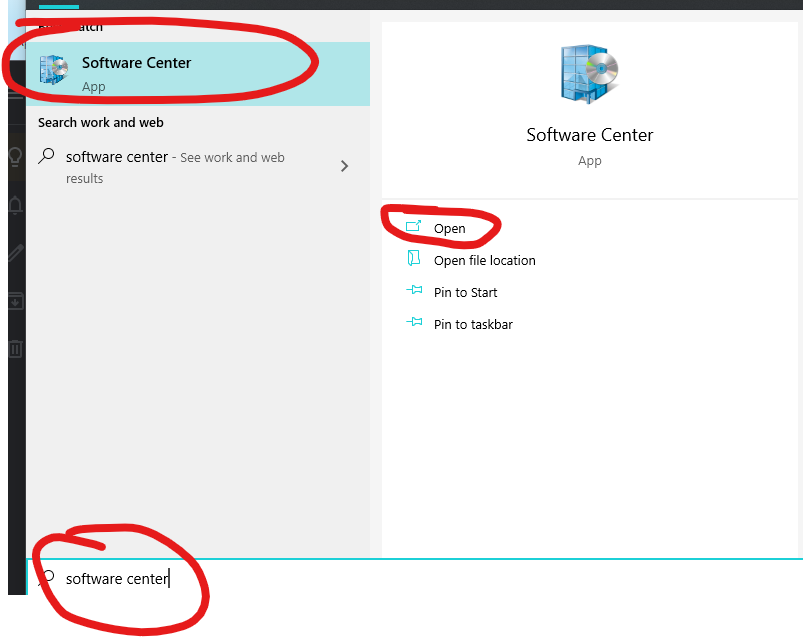
The following directions will apply if you are unable to find Dell Command | Update in the Start Menu. If Dell Command | Update appears and is installed you can skip to the section "Launching the Dell Command Application" in this guide.
1. Click on the Search Bar at the bottom-left of the screen and type "Software Center" in the field.
2. The Software Center app will appear in the search results. Click either the "Open" option or press the enter key on your keyboard to open the app.

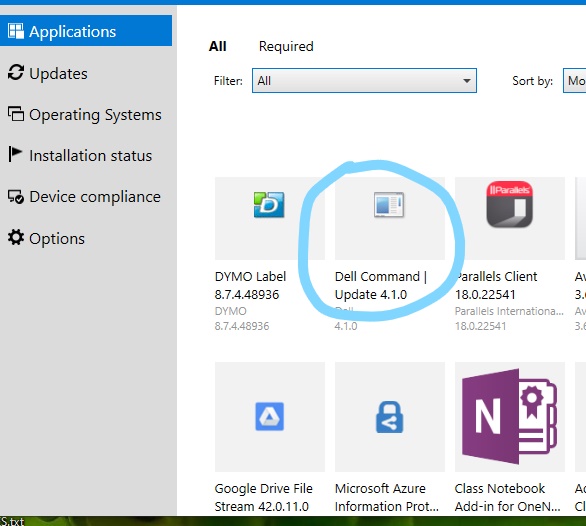
3. Once in Software Center, click the Applications tab from the left-hand menu and look for, then select the app labelled "Dell Command | Update".
4. The app details screen will appear. Click on the "Install" button to begin the installation process.
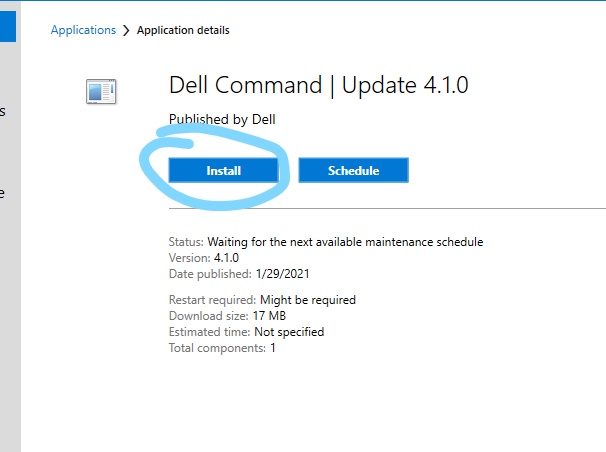
5. The status will change to "Installed" once the application is finished installing.
1. Click on the Start Menu at the bottom-left of the screen and type "Dell Command Update" in the search bar.
2. Click on the app "Dell Command | Update" to open the application.
![]()
- If Dell Command | Update does not appear in the start menu please follow the directions in the section "Installing the Dell Command Application" to install the app. If the app still does not open or appear you can contact the LPS Help Desk for further assistance.
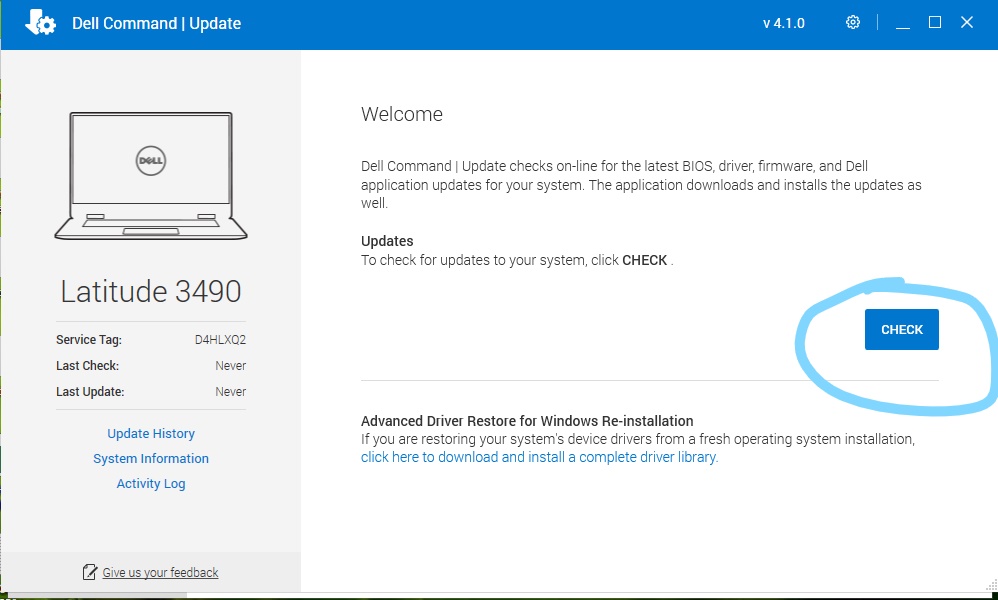
1. Inside Dell Command | Update app click the Check button.
2. Make sure the "Automatically restart system (when required)" option is checked on, then click the Install button.
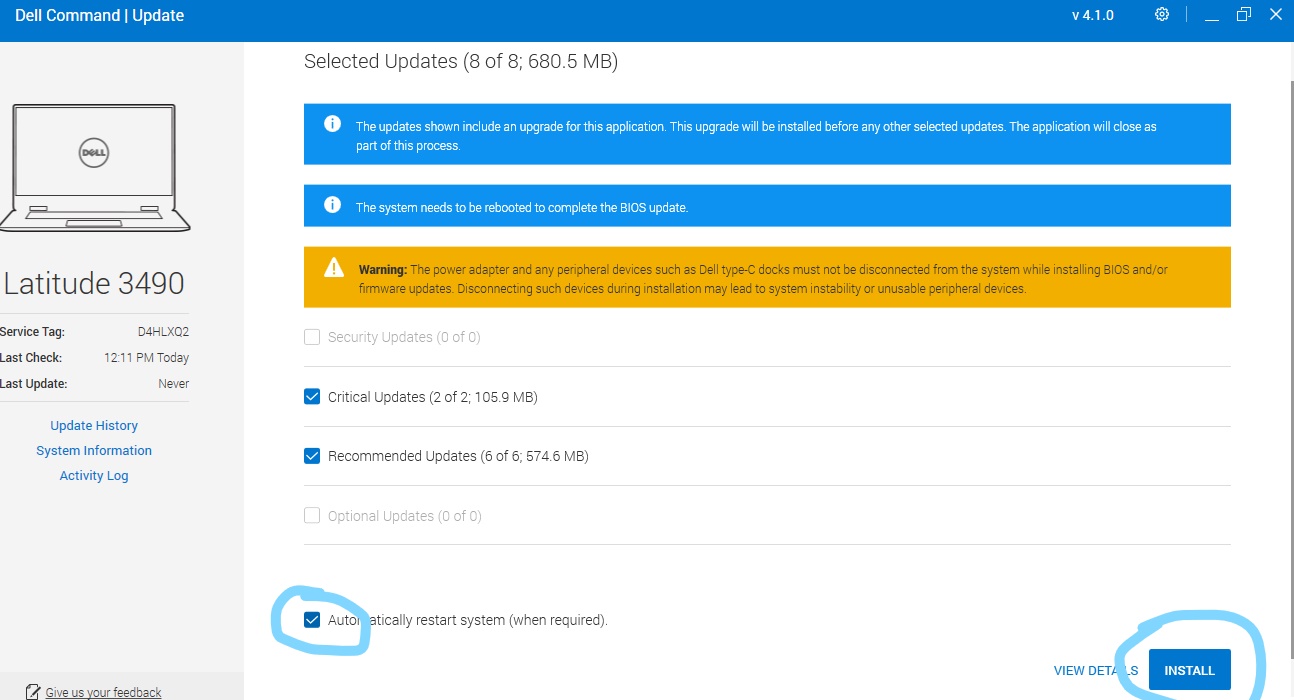
3. This will begin to install any pending driver updates for your system. You can view the status of the installation process from the progress bar.
4. After the updates have been installed the device will automatically restart. If the device does not restart automatically you can manually restart by clicking the Start menu, then click Power icon and choose the Restart option.
![]()
Article ID: 1087
Created: June 9, 2021
Last Updated: October 7, 2021
Online URL: https://kb.lawrence.k12.ma.us/article.php?id=1087