How to share a screen to a Promethean display - Miracast
Promethean displays have the ability to wirelessly display content from a Windows laptop using Miracast.
Starting a screen sharing session
- On the Promethean display, tap on the menu button at the bottom-center of the screen. It should appear as a slim black button with 3 dots "..." in it
- You can also press the Promethean button at the bottom of the display

- Tap on the "Applications" icon

- In the "Applications" window tap on the "Screen Share" app

- A new window will appear. Tap on the waiting room icon at the bottom-left of the window

- Note the name that appears next to "Panel Name" at the top of the screen in the waiting room. This will be the name of the display you will be connecting to

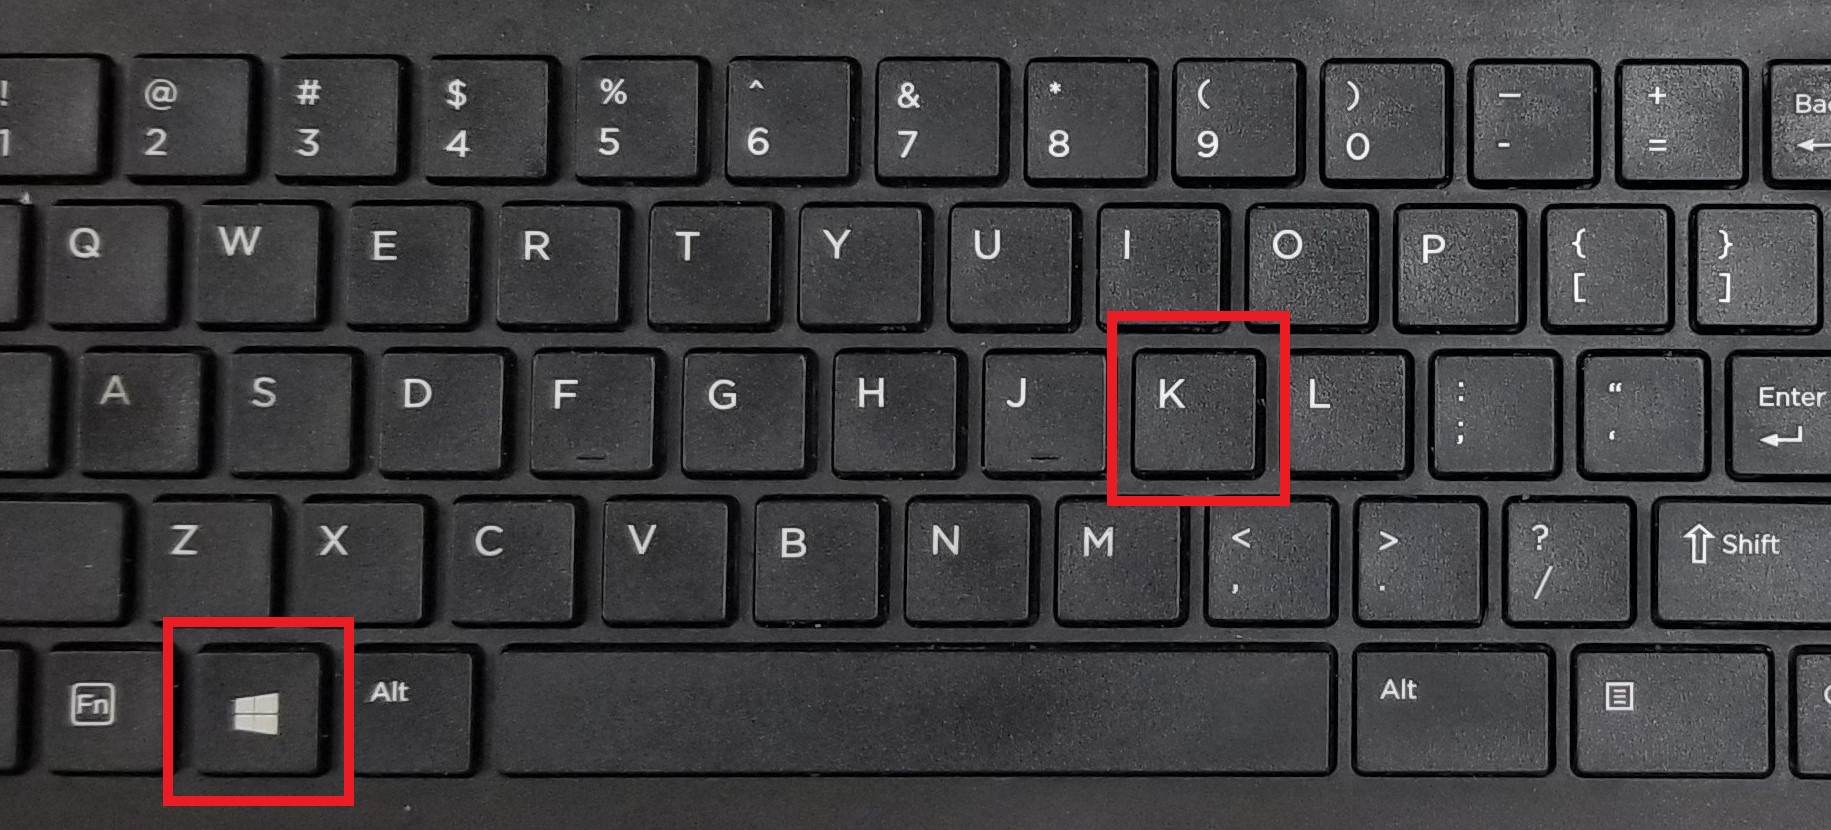
- On the laptop, press the the Windows and K keys on the keyboard

- A sidebar will appear on the right side of the screen
- Click on the display you want to connect to. This will have the same name that appears on the physical display in the room

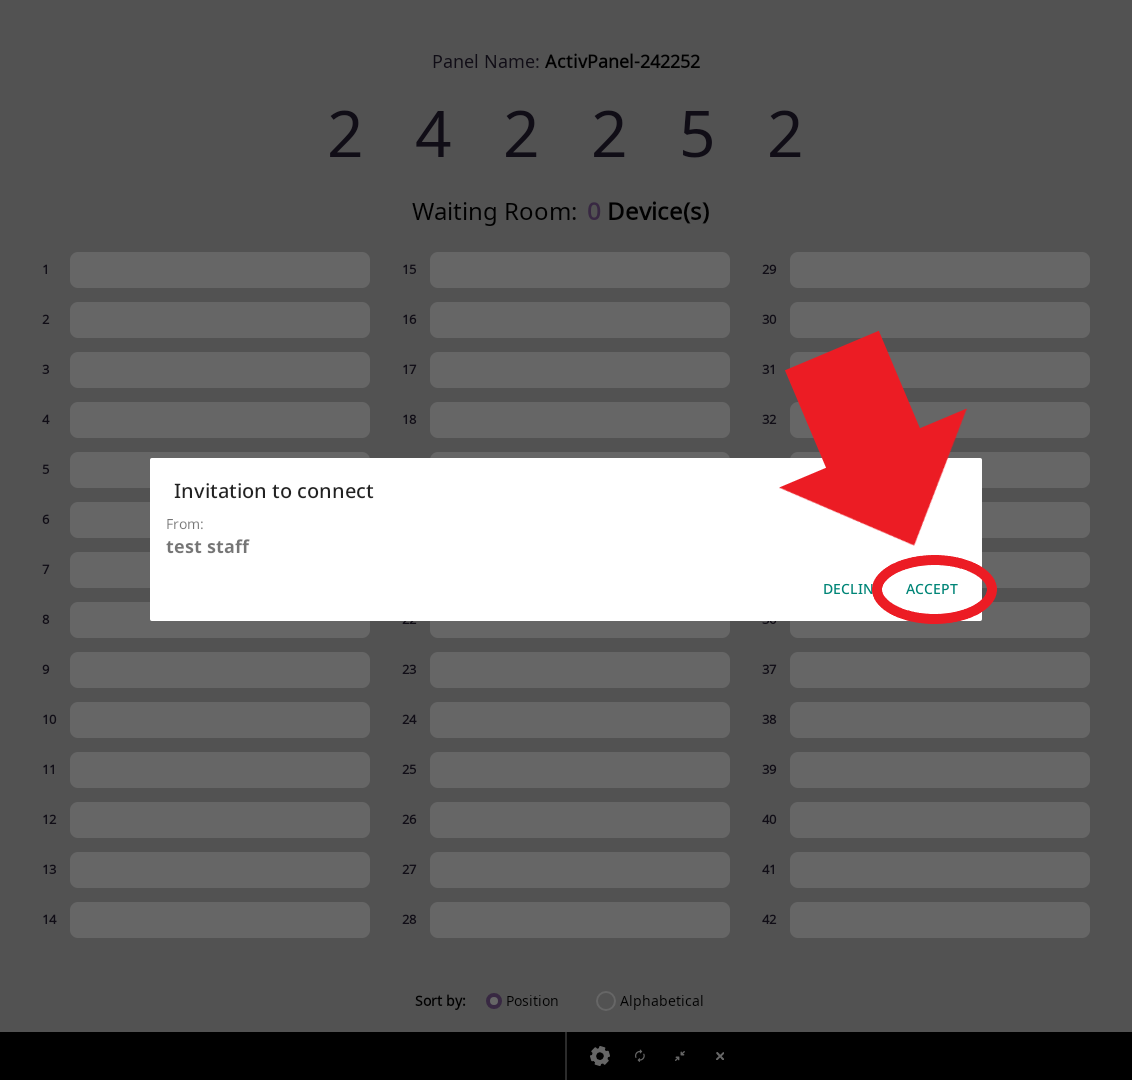
- On the Promethean display, you may see an invitation pop-up window. Tap on "Accept"

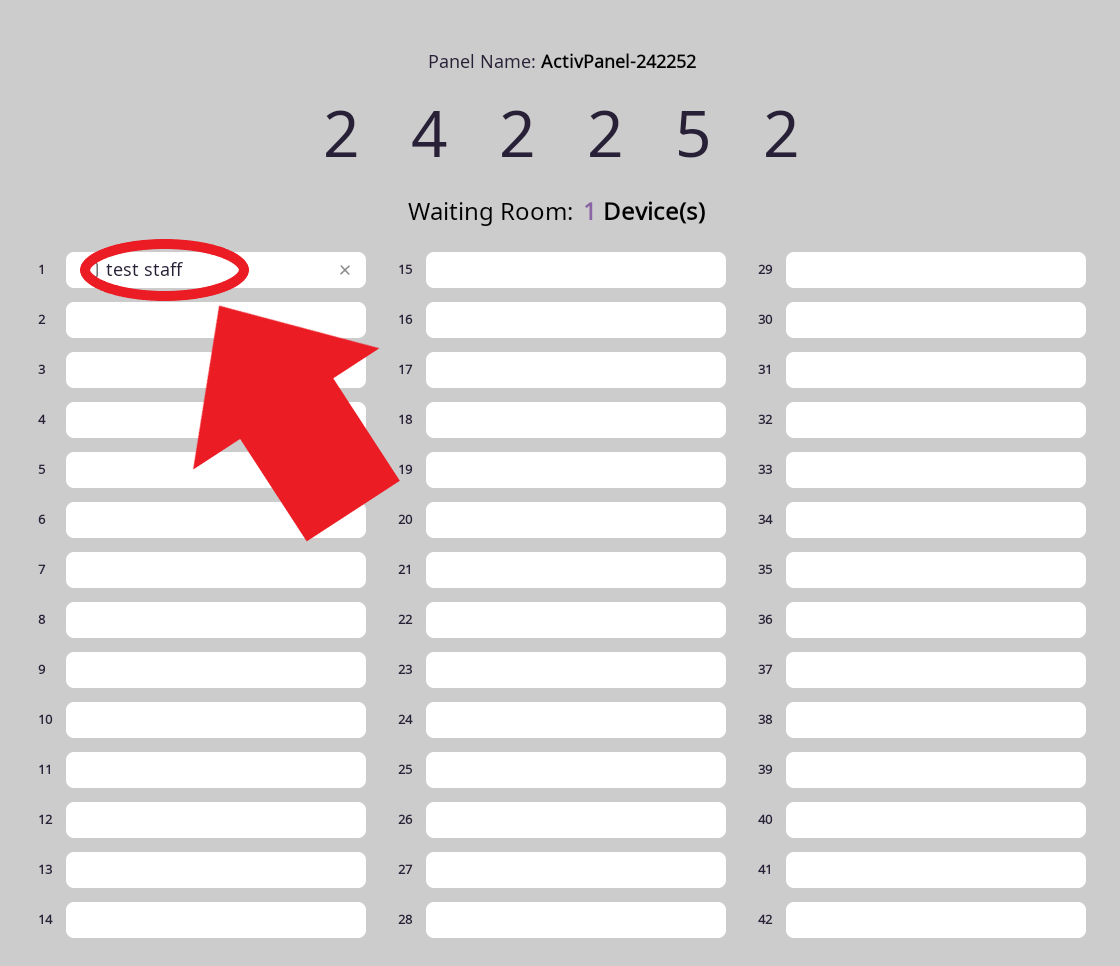
- The name of the person connecting to the display will then appear in the waiting room. Tap on the name to view the screen on the Promethean display
 |
 |
| Tap on name to share display | Laptop screen will appear on the display |
- On the laptop, once connected, you can click on "Allow mouse, keyboard, touch, and pen input from this device" in the sidebar to allow the Promethean display's touchscreen to work with your laptop

- If needed you can change the way content is displayed by clicking "Change projection mode"

- You can select from either "Duplicate" or "Extend". Duplicate will mirror your laptop screen to the display. Extend will treat the display as a second monitor

- A menu bar will also appear at the top of the screen. When you are finished with the session you can click "Disconnect" to stop sharing the laptop to the display
![]()