Setting Up Epson EB-L260F, 725Wi Projector
Initial Setup Up
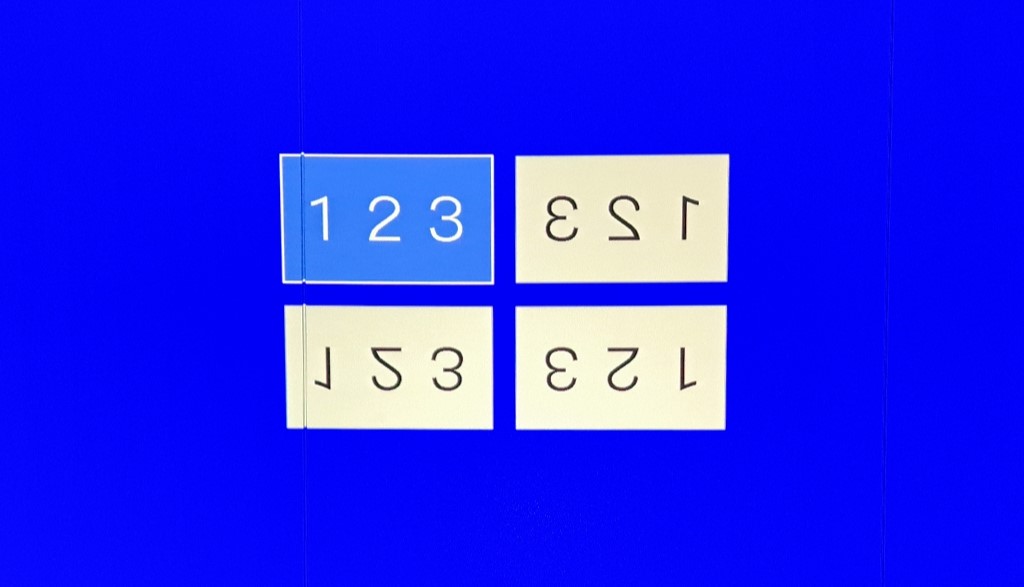
Select the correct orientation. Select the numbers on screen that are projected correctly
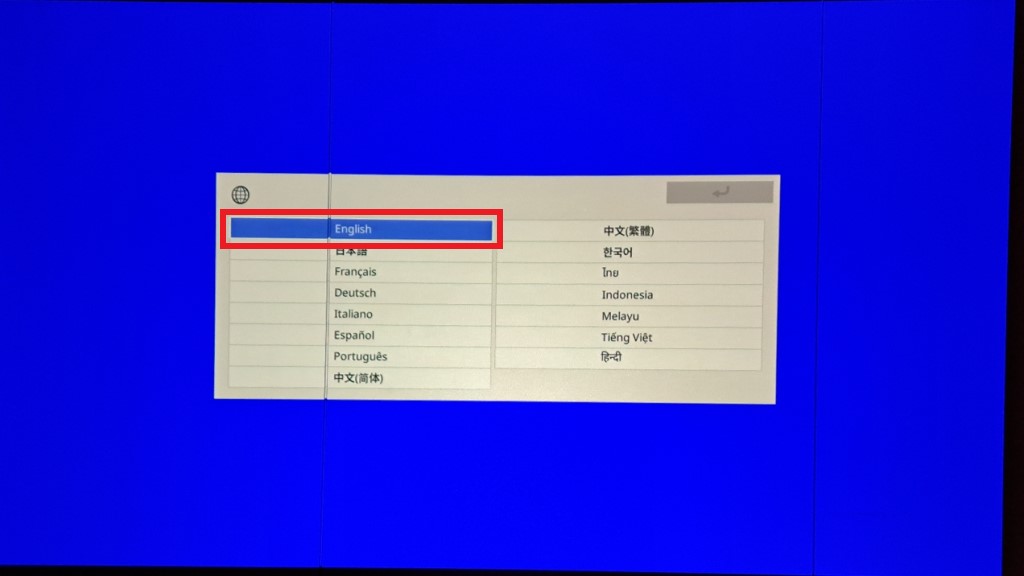
Select "English" for the language
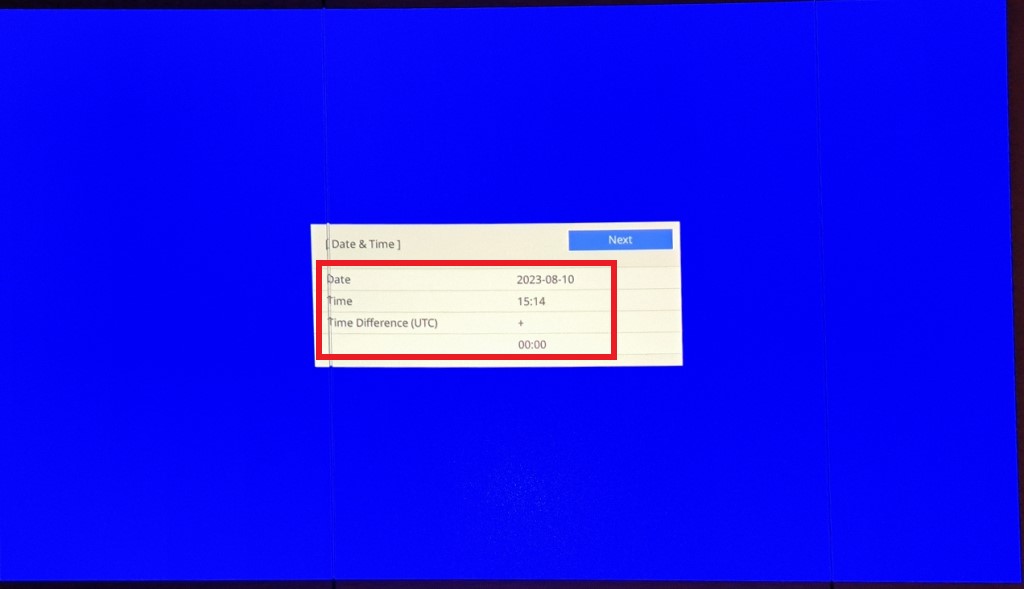
Set the time & date. Also make sure to set the correct "Time Difference" (this is the time zone). It should be set to -05:00
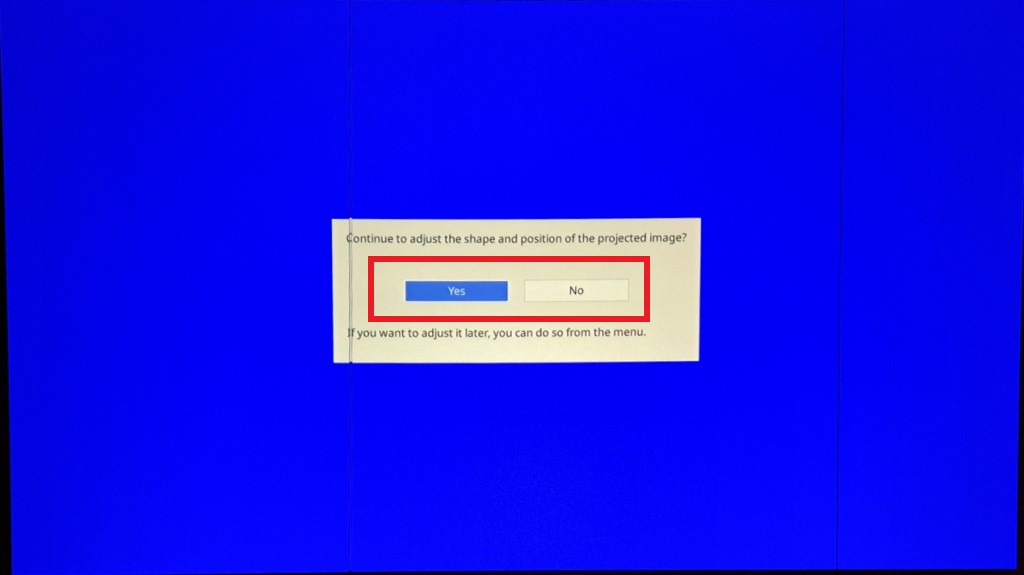
If you need to make additional adjustments to the image select "Yes", otherwise select "No"
Setting up mirroring
Press the "Menu" button on the remote
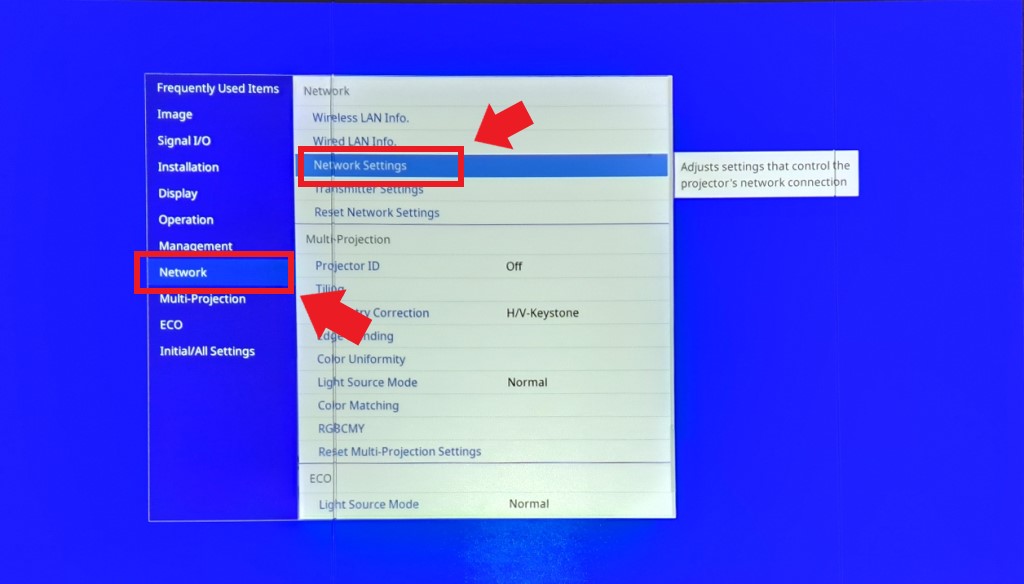
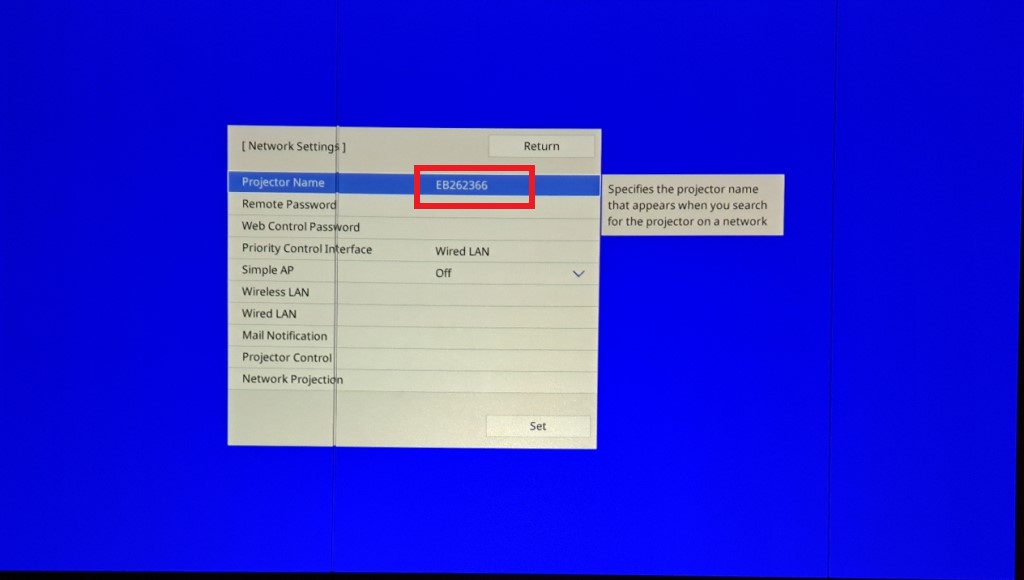
Select "Network" from the menu on the left side, then select "Network Settings" from the menu on the right side
If you want the projector to have a specific name select "Projector Name" to change its name
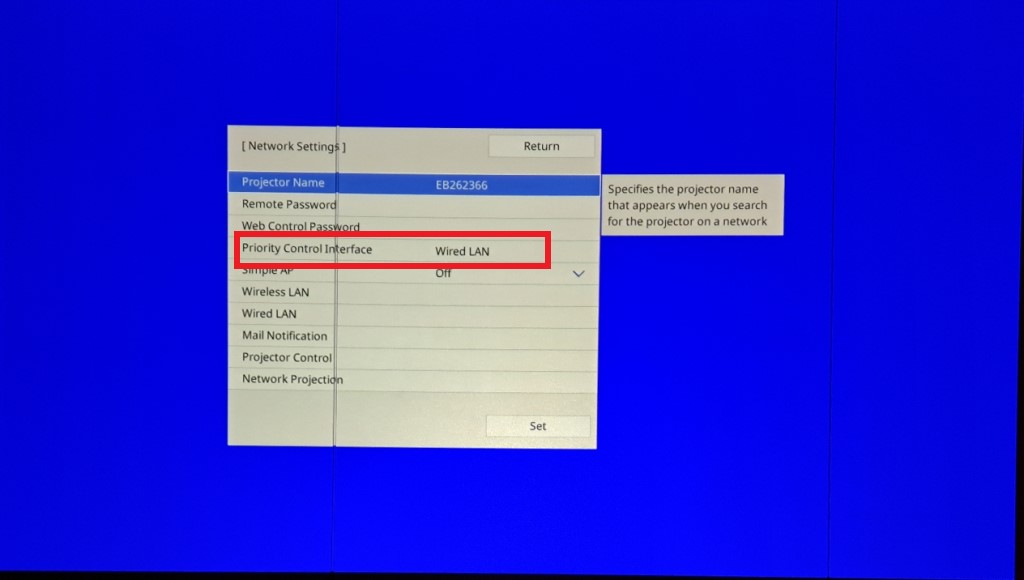
Select "Priority Control Interface"
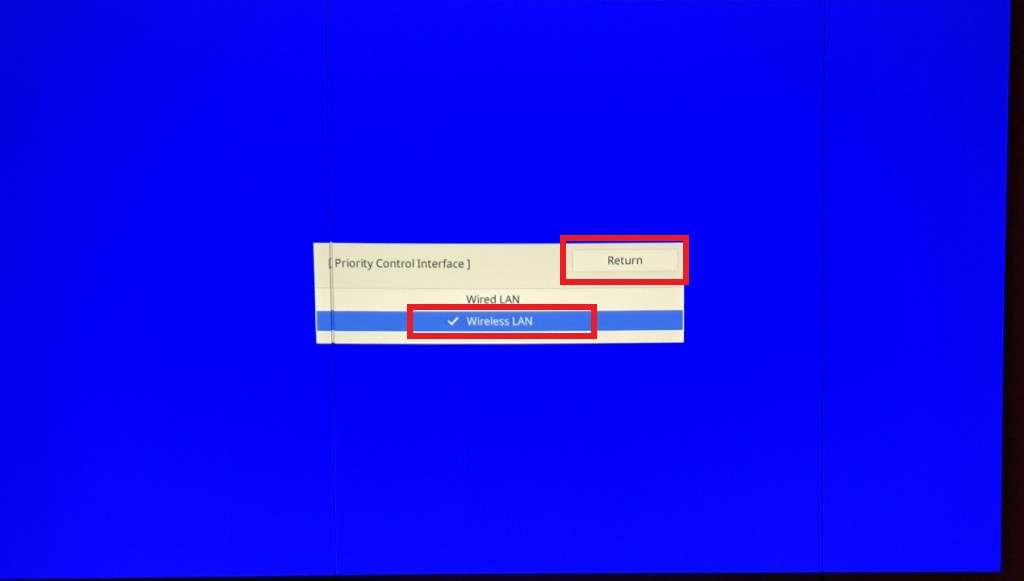
Select "Wireless LAN", then select "Return"
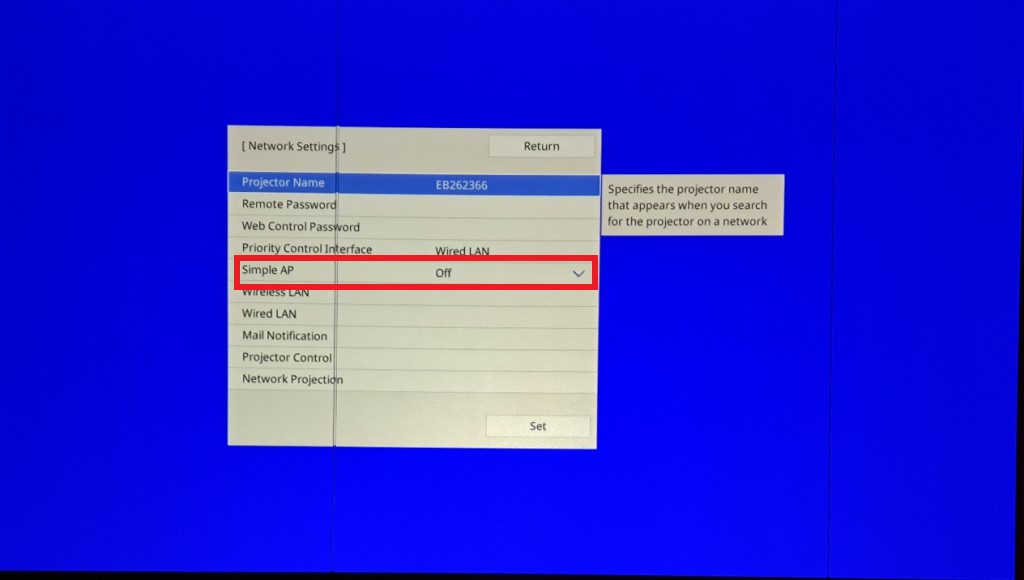
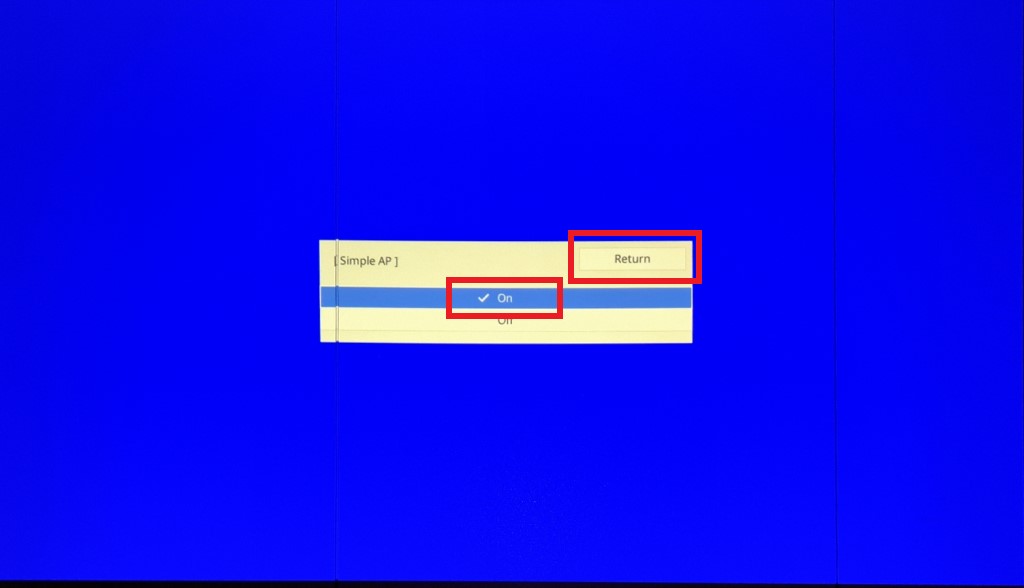
Select "Simple AP"
Select "On", then select "Return"
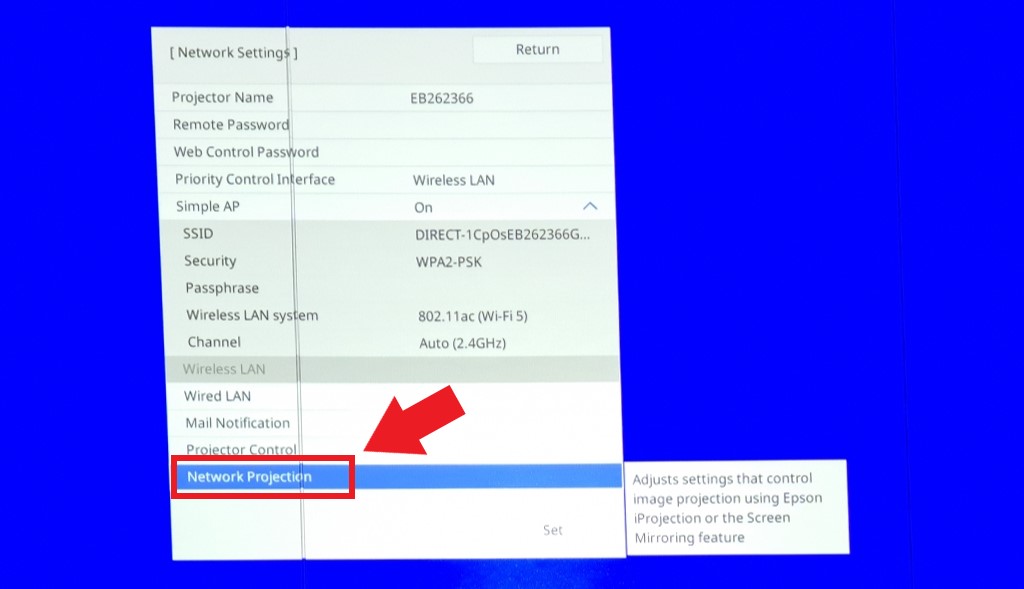
Select "Network Projection"
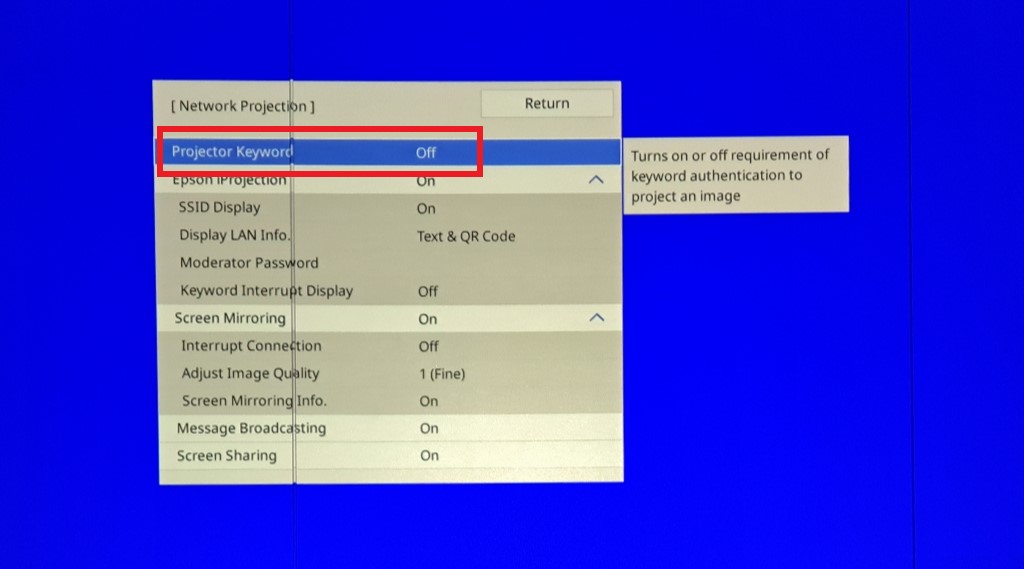
Select "Projector Keyword"
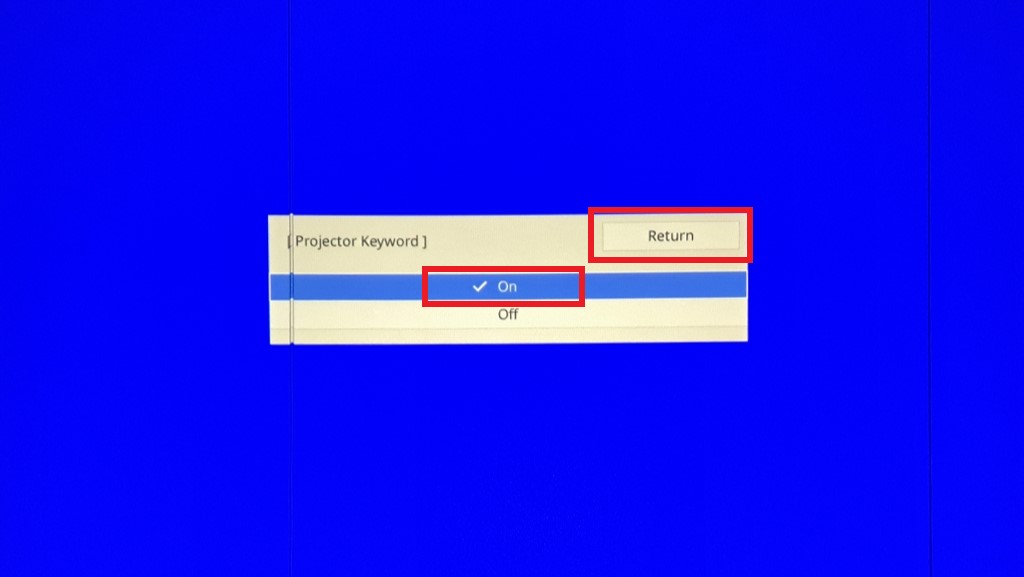
Select "On", then Select "Return"
Select "Epson iProjection"
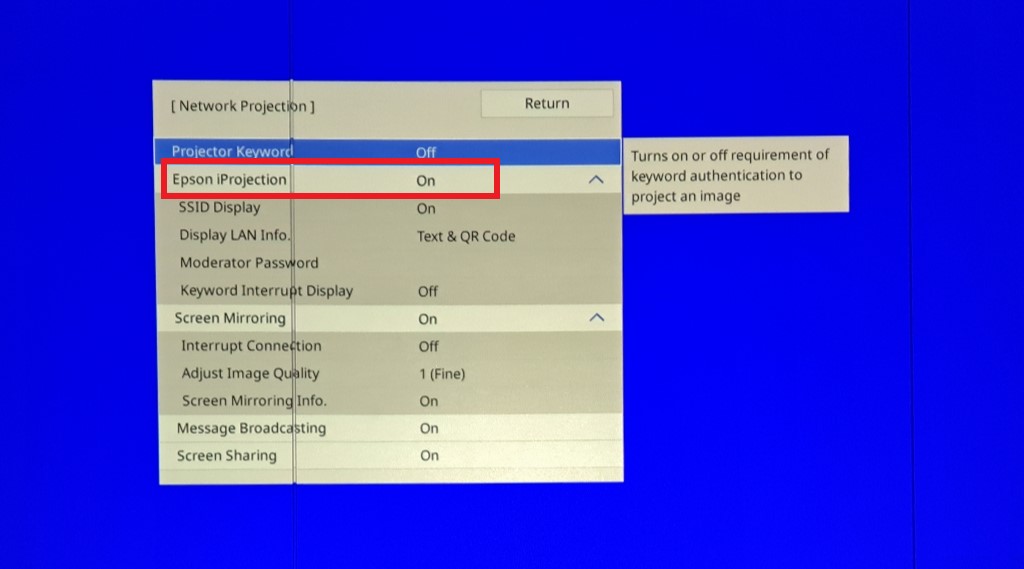
Select "Off", then select "Return"

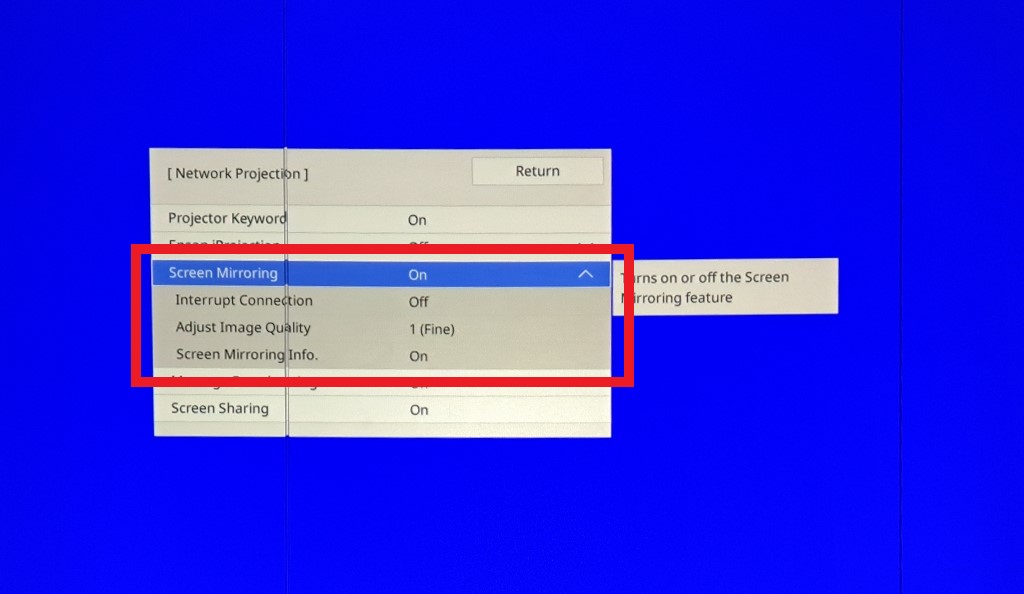
Ensure "Screen Mirroring" is On and the options below it look the same as the image below
Select "Interrupt Connection" under Screen Mirroring
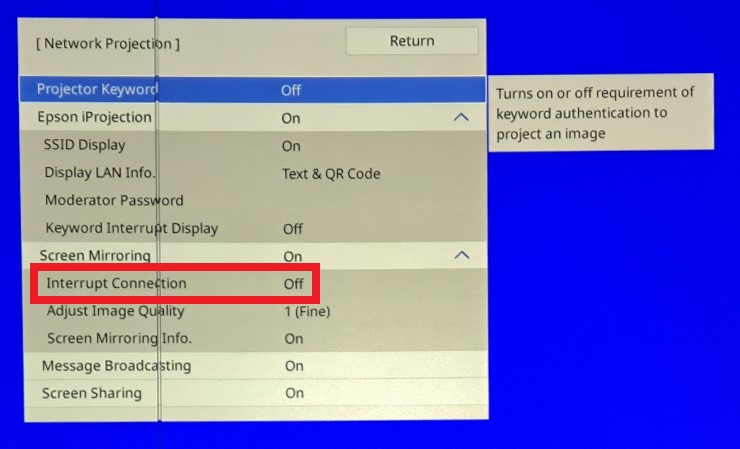
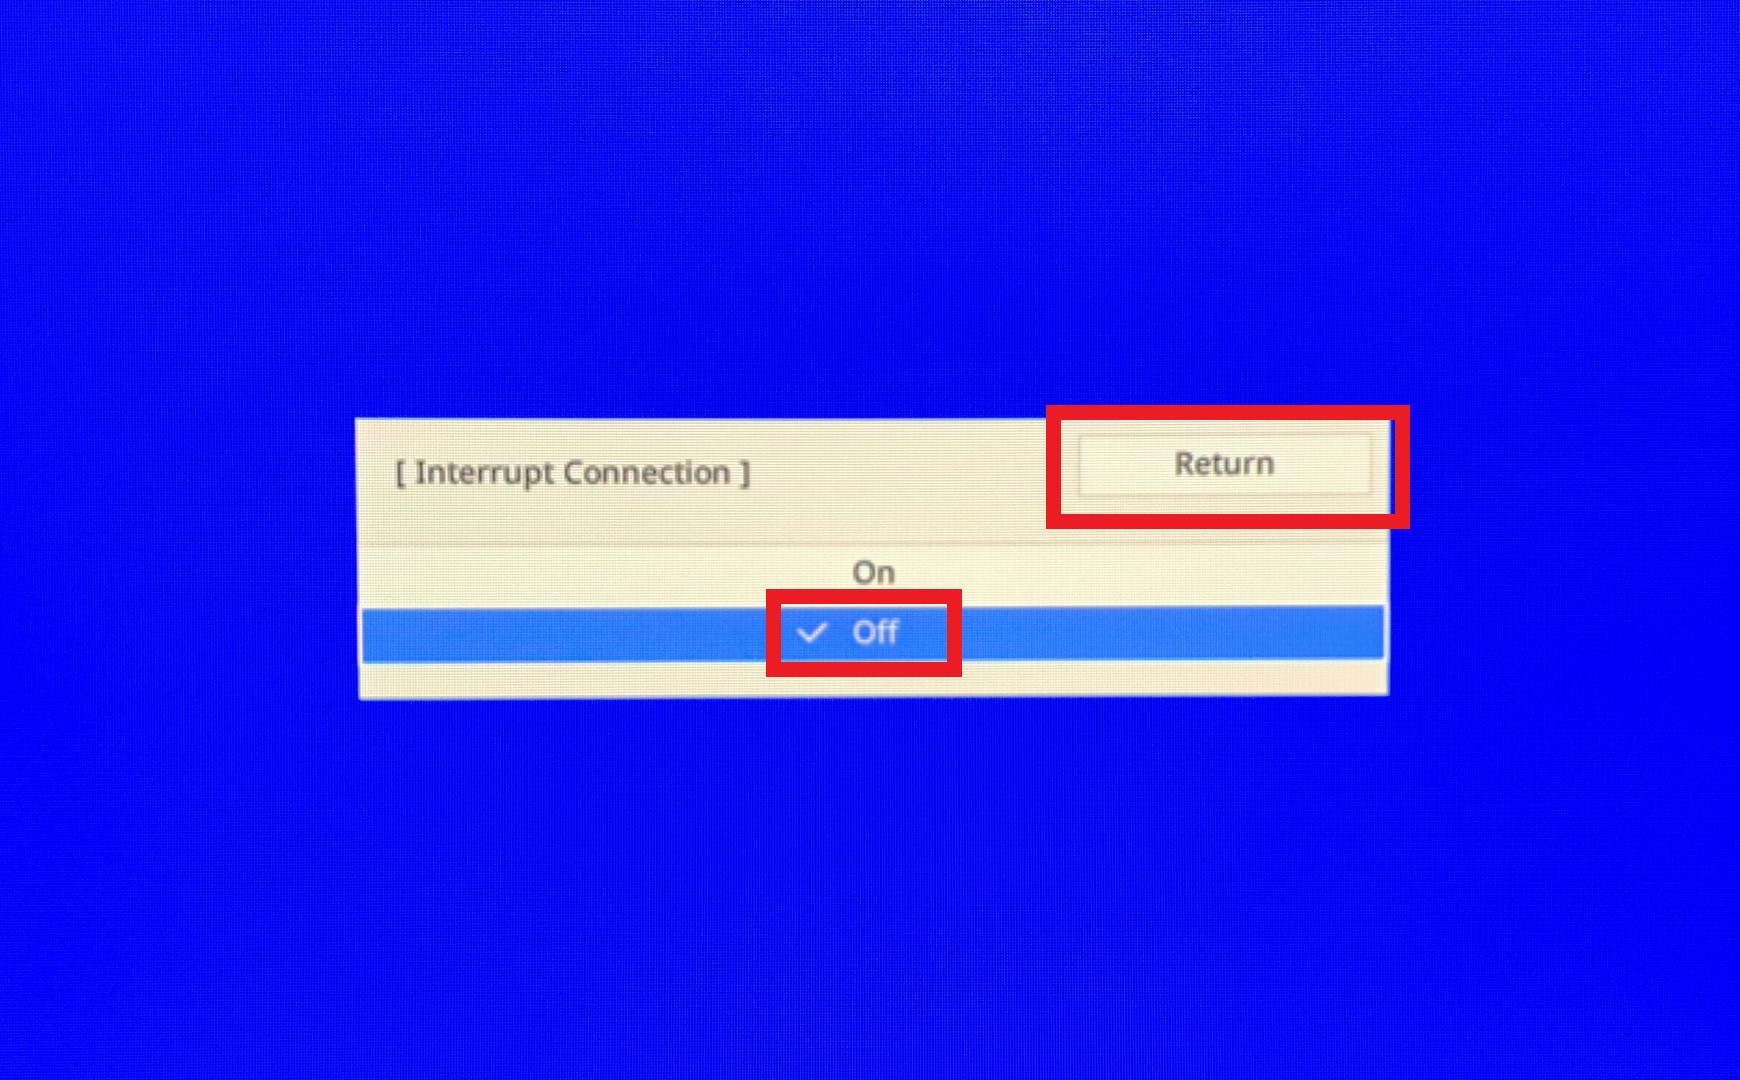
Select "Off", then select "Return"
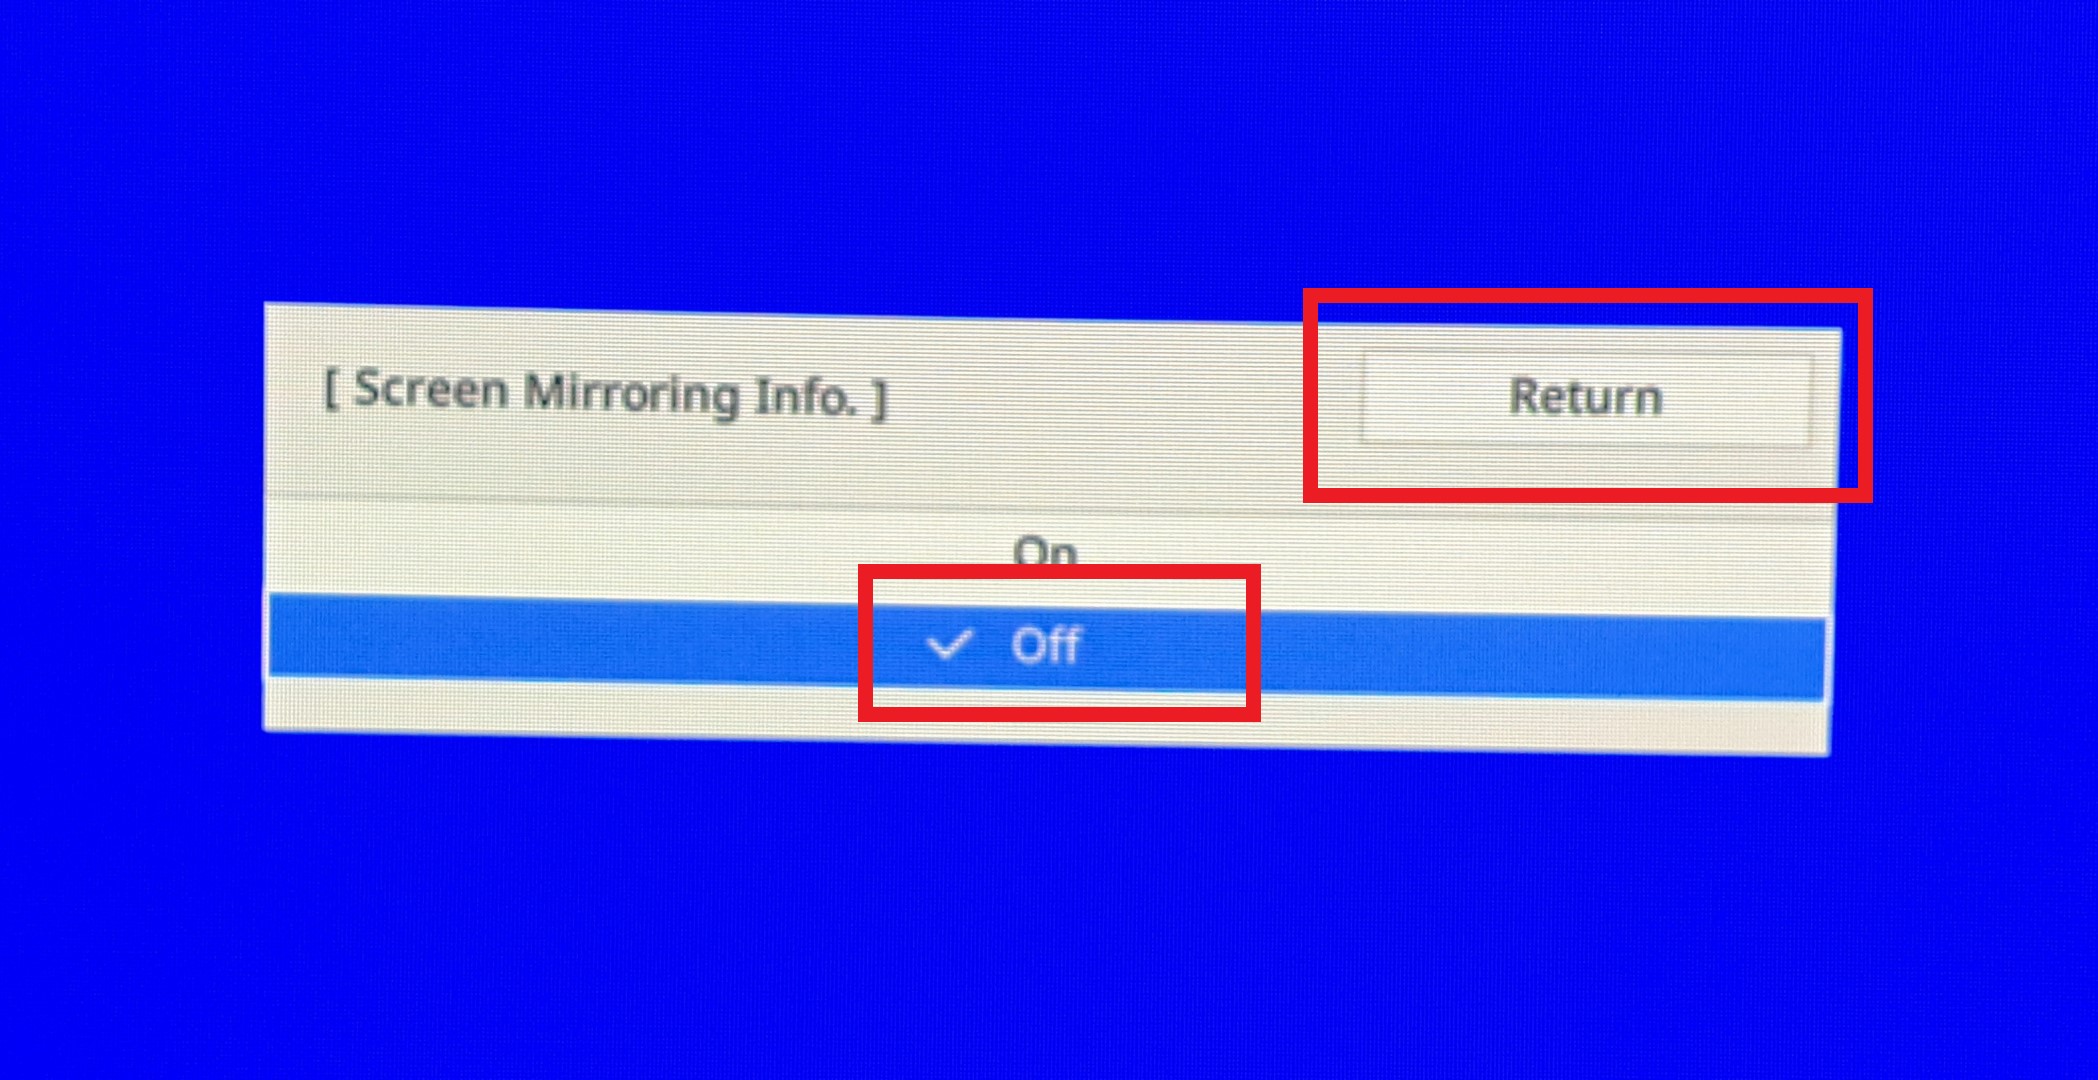
Select "Screen Mirroring Info." under Screen Mirroring
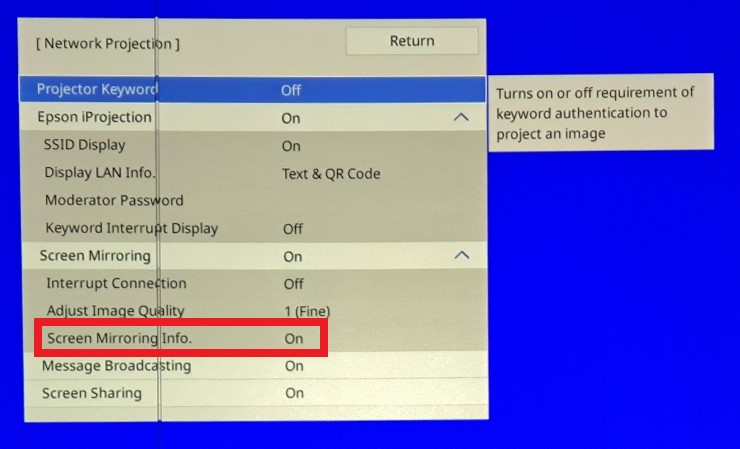
Select "Off", then select "Return"
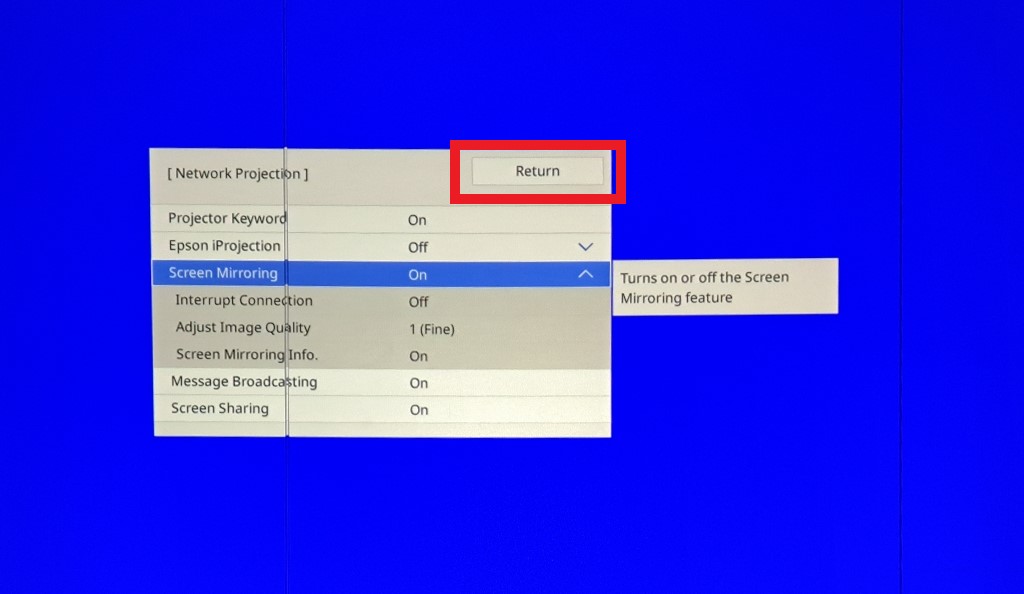
Select "Return"
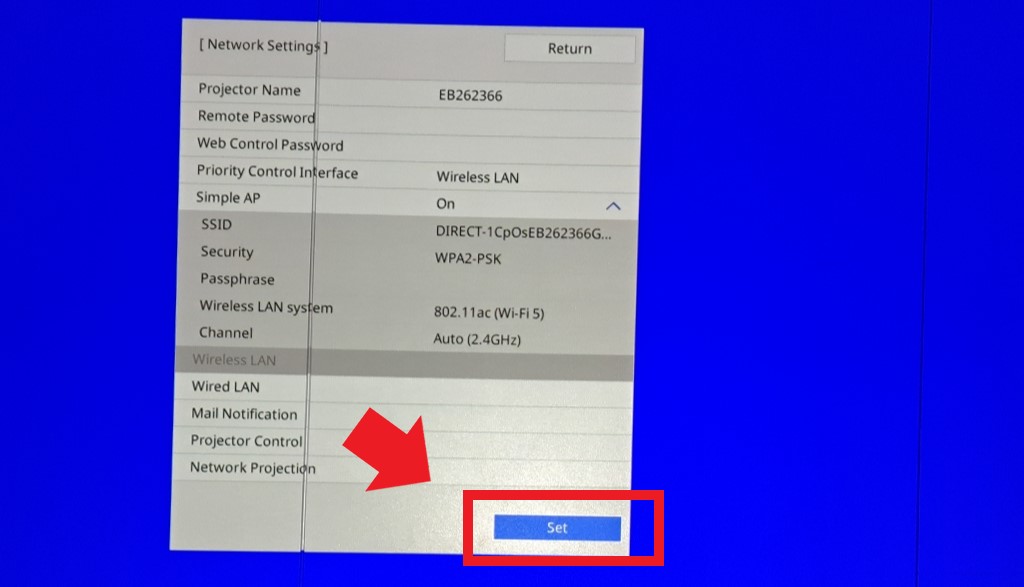
Select "Set"
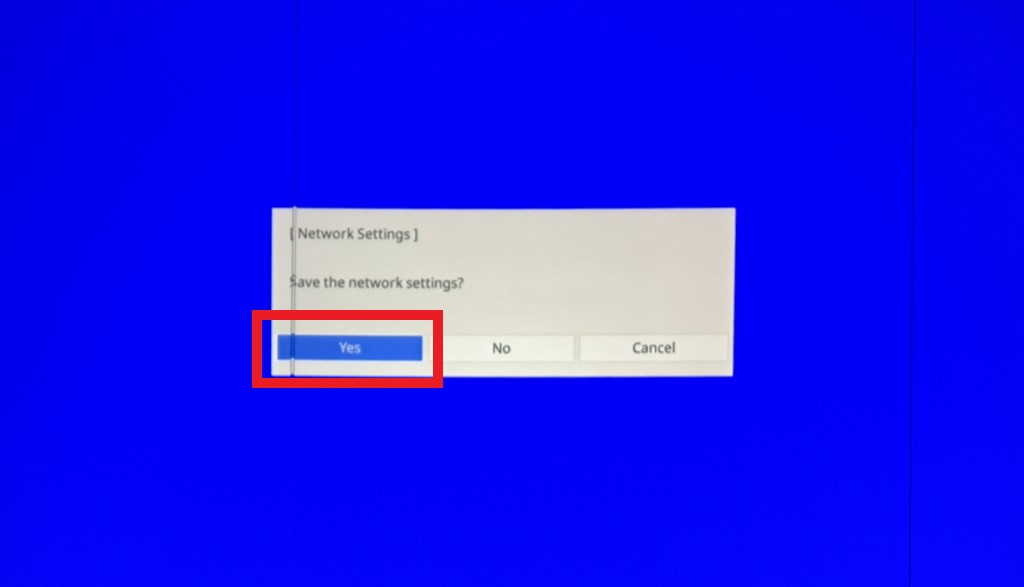
You will be prompted to save the network settings. Select "Yes"
You will be taken back to the main settings menu. You can exit this menu at any time
Sharing Screen
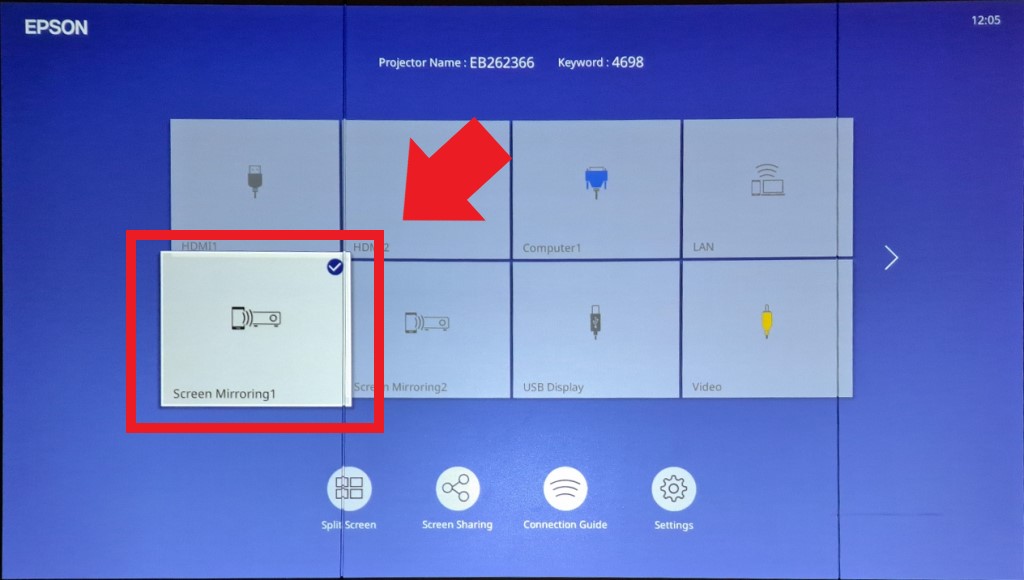
Press the Home button on the remote
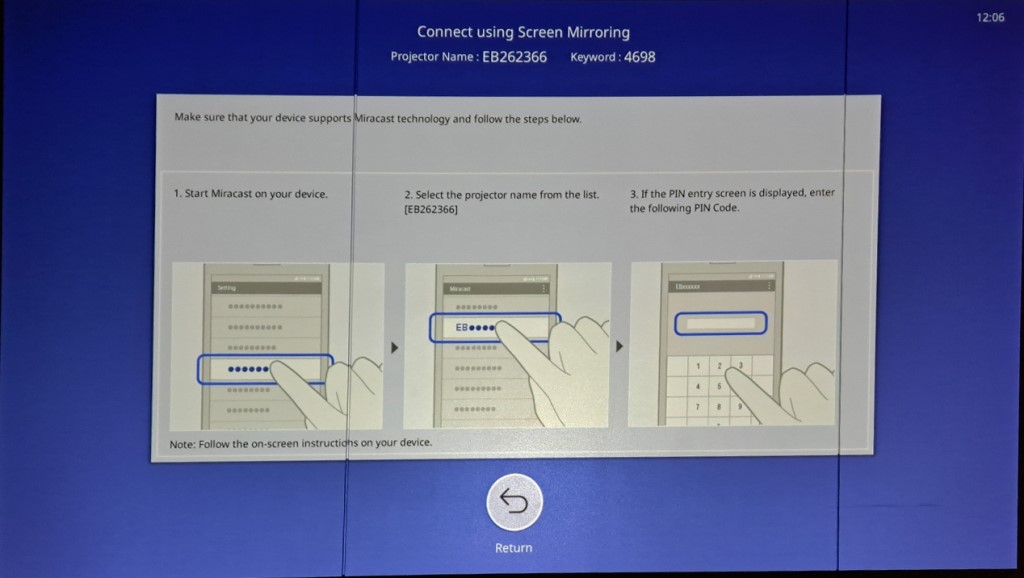
At the home screen the projector name and keyword will be displayed at the top of the screen. This will be needed when attempting to connect to the projector.
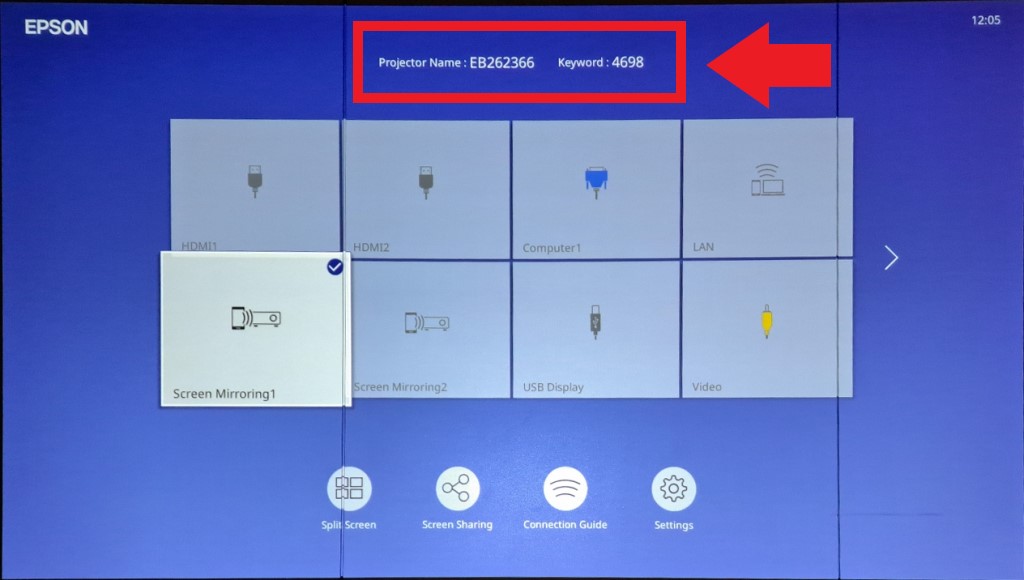
More instruction can be seen if you select "Screen Mirroring1" or "Screen Mirrroring2" from the home screen