How do I use the IncidentIQ Ticketing System?
Table of Contents
Overview
What is Incident IQ?
Incident IQ is the help desk software used by LPS to log and manage all help desk requests. This is the main software used by IT staff when any help desk request is logged.
What access do LPS staff have?
LPS staff have the ability to access the Incident IQ system using their LPS account. Once logged in any staff member will be able to create a new ticket as well as view any current open or closed tickets they may have created. Staff will also have the ability to add comments to any open ticket which will be seen by the tech that is assigned to it.
Logging in to Incident IQ
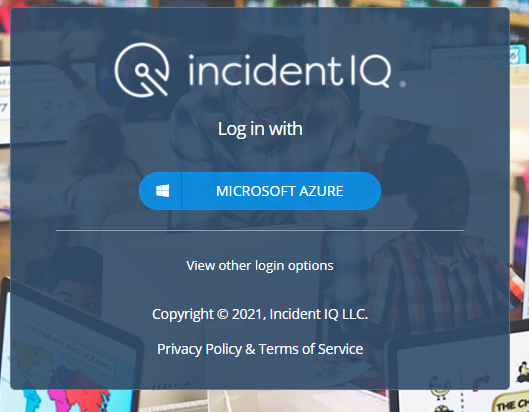
- Visit the Incident IQ dashboard (https://lawrence.incidentiq.com/requestor/dashboard).
- Click "Microsoft Azure" then log in using your LPS email and password.
Creating A New Ticket
Starting a new ticket
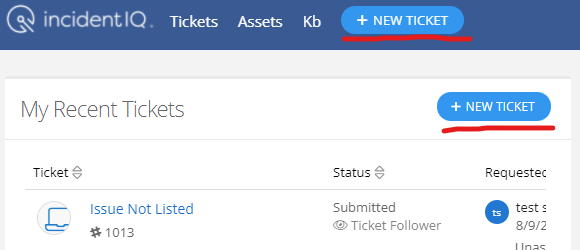
- After logging in, click the "+ New Ticket" button. This is located either to the right of the "My Recent Tickets" section or in the menu bar at the top of the page.
Selecting a category
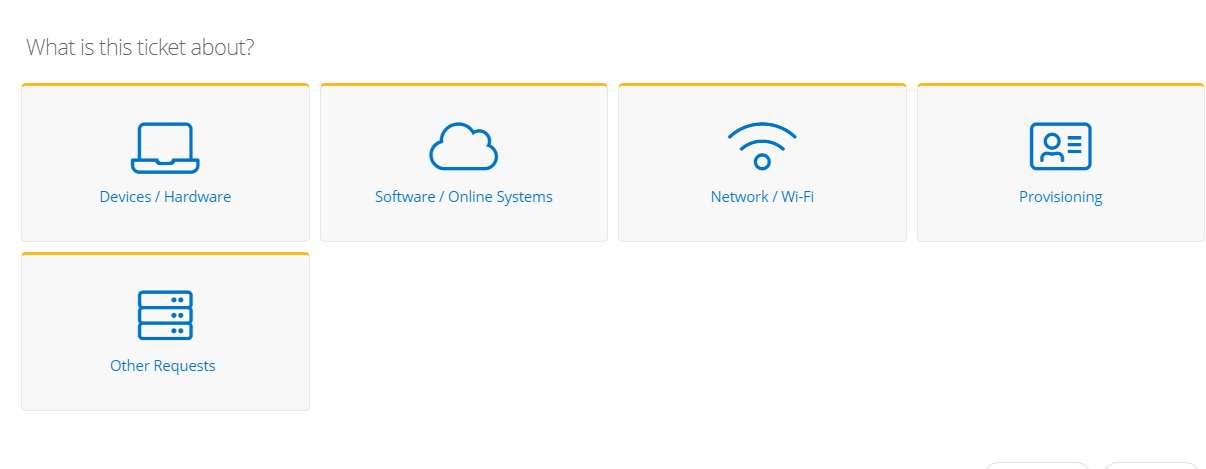
- When creating a new ticket you will need to select a category relating to your issue. You can also choose "Other Requests" for more general issues.
Category Types:
Devices / Hardware: Desktops, Laptops, Chromebooks, Printers, Phones, etc.
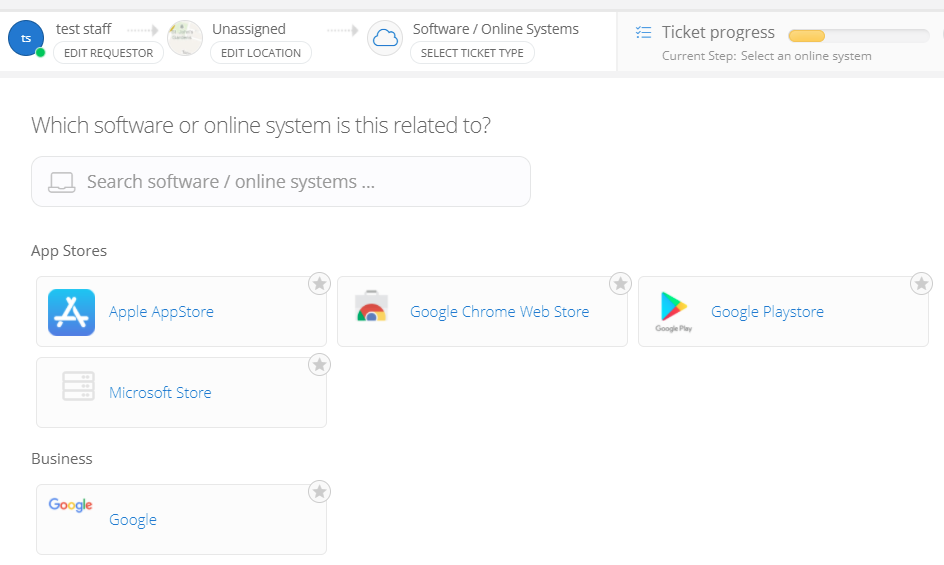
Software / Online Systems: Software Installs, Mobile Apps, Clever, Google, Munis, etc.
Network / Wi-Fi: General network and wireless issues.
Provisioning: No login access, Account lockouts, Password resets, Other general account issues.
Other Requests: Misc. requests.
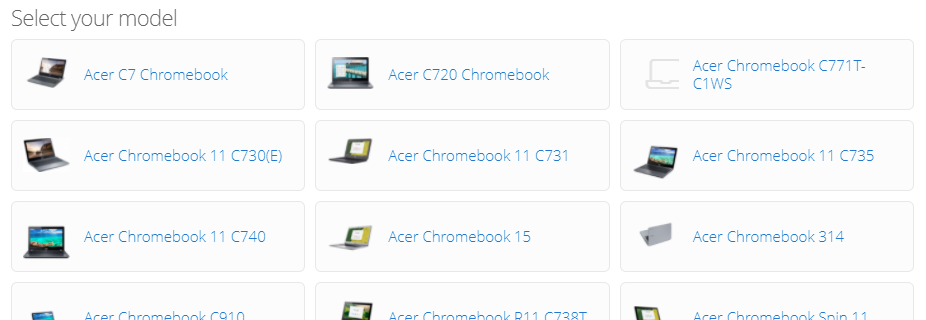
- Some categories may ask to select the device model or software with the issue.
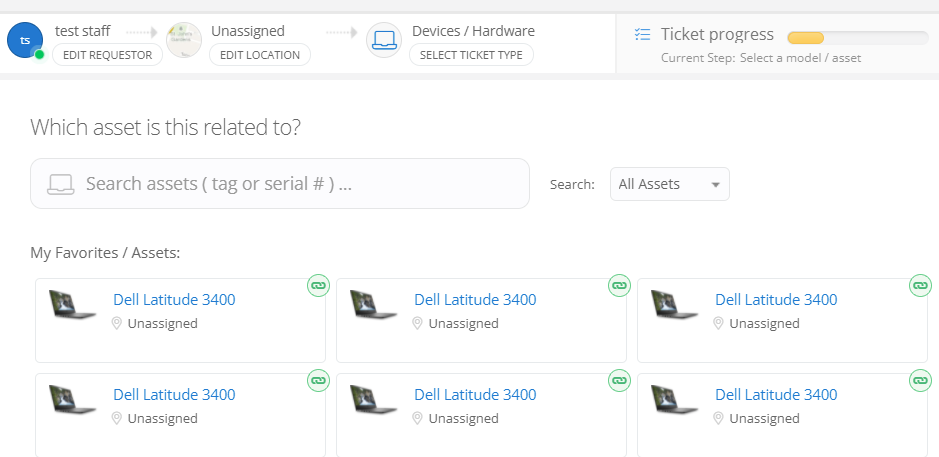
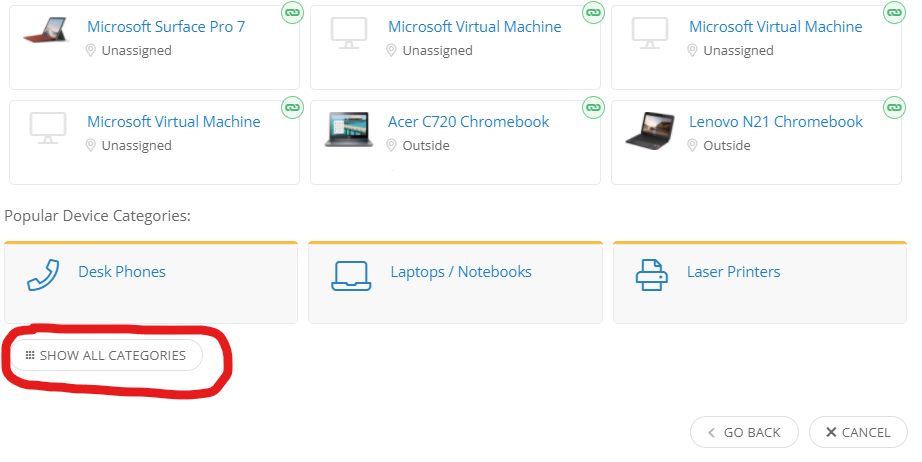
- For example, the "Devices / Hardware" category may list your commonly used models at the top of the page.
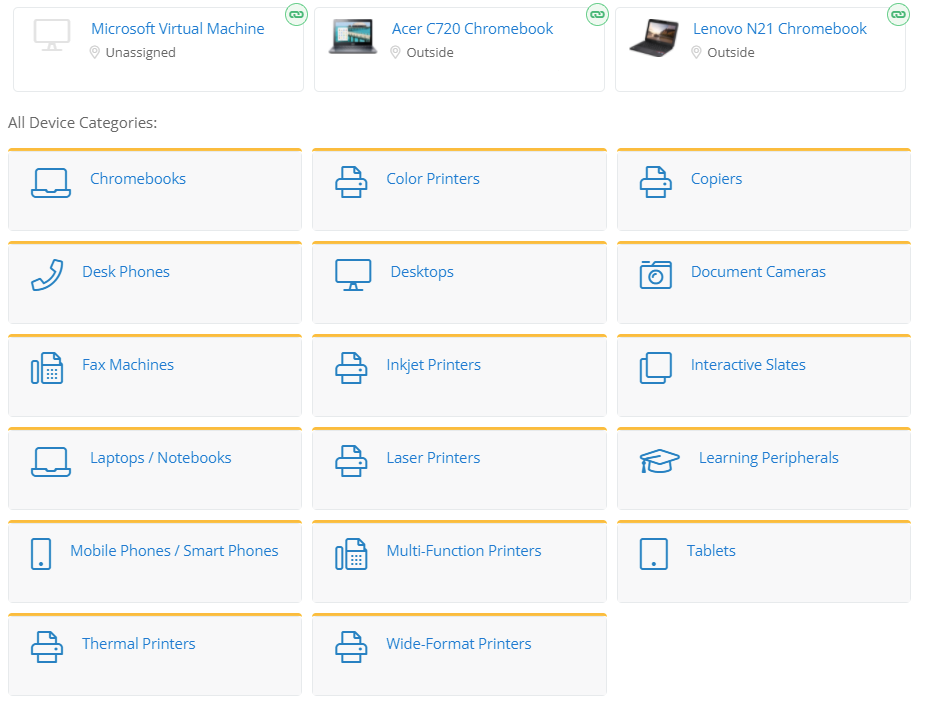
- If you are choosing the "Devices / Hardware" category and your device is not listed you will need to choose the device category type, followed by the brand and model of the device.
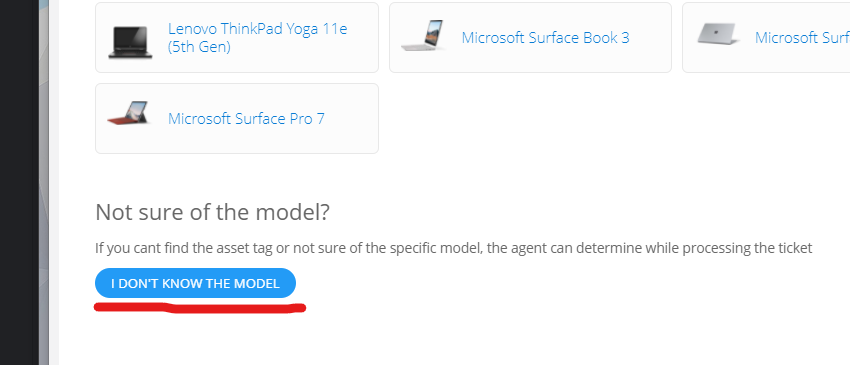
- If you are unsure of the exact model you can click on "I don't know the model" to continue.
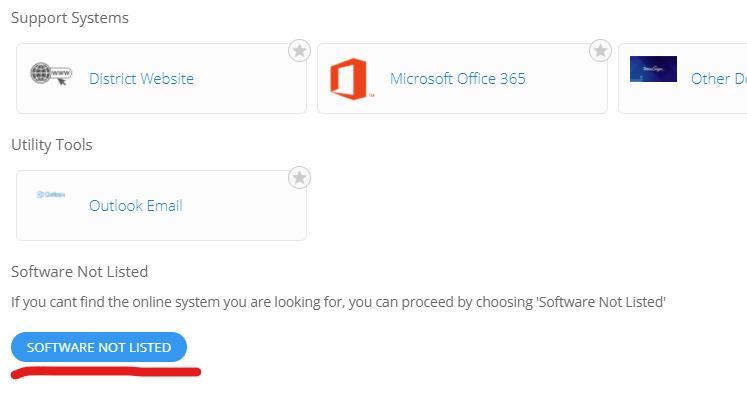
- If you are choosing the "Software / Online Systems" category you will need to choose the software or service you are having an issue with.
- If you are unsure of the software or service with the issue you can click on "Software not listed" to continue.
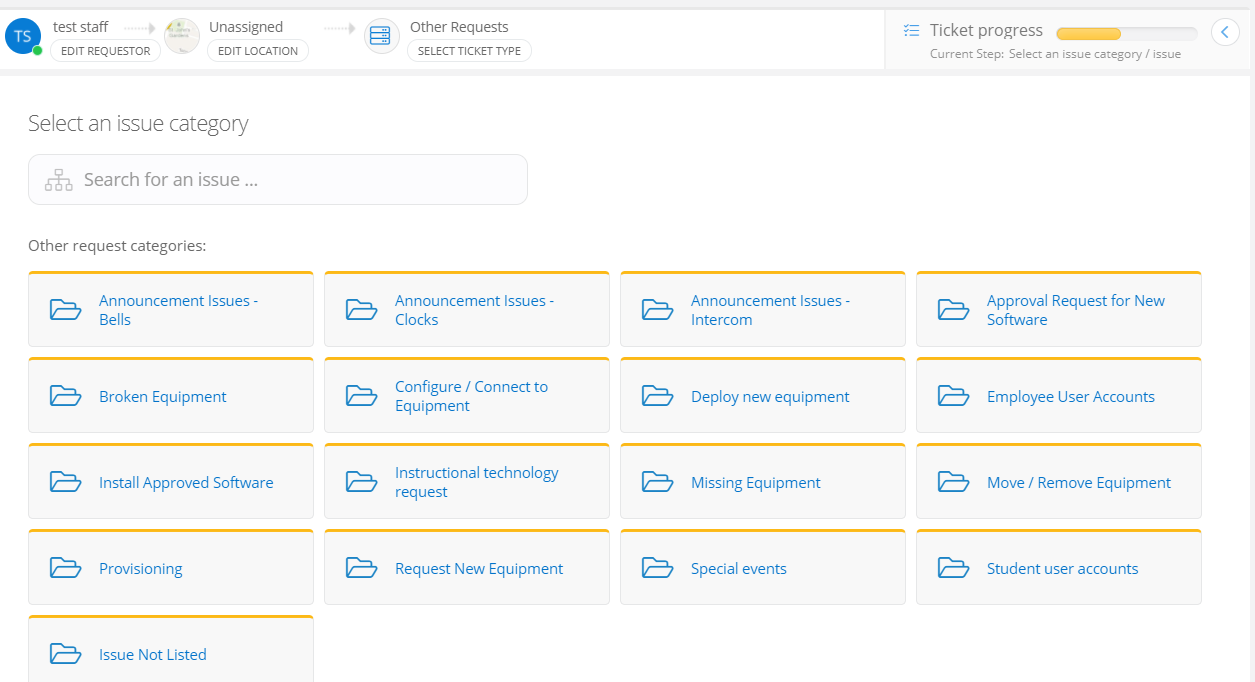
- Once you have chosen a device, software or have chosen a category that does not require this you will be presented with issue sub-categories related to the device or category.
- Select the sub-category that most closely resembles your issue. You may also click on "Issue Not Listed" if you are unable to locate your specific issue.
Filling details
- Once the category and issue has been selected you will need to describe the issue or request in detail along with other relevant information.
- The "Location/Room Details" should contain the room number of the staff member submitting the ticket or the room where the device with the issue is located.
- You can include screenshots, pictures, or other files to help describe your issue if applicable.
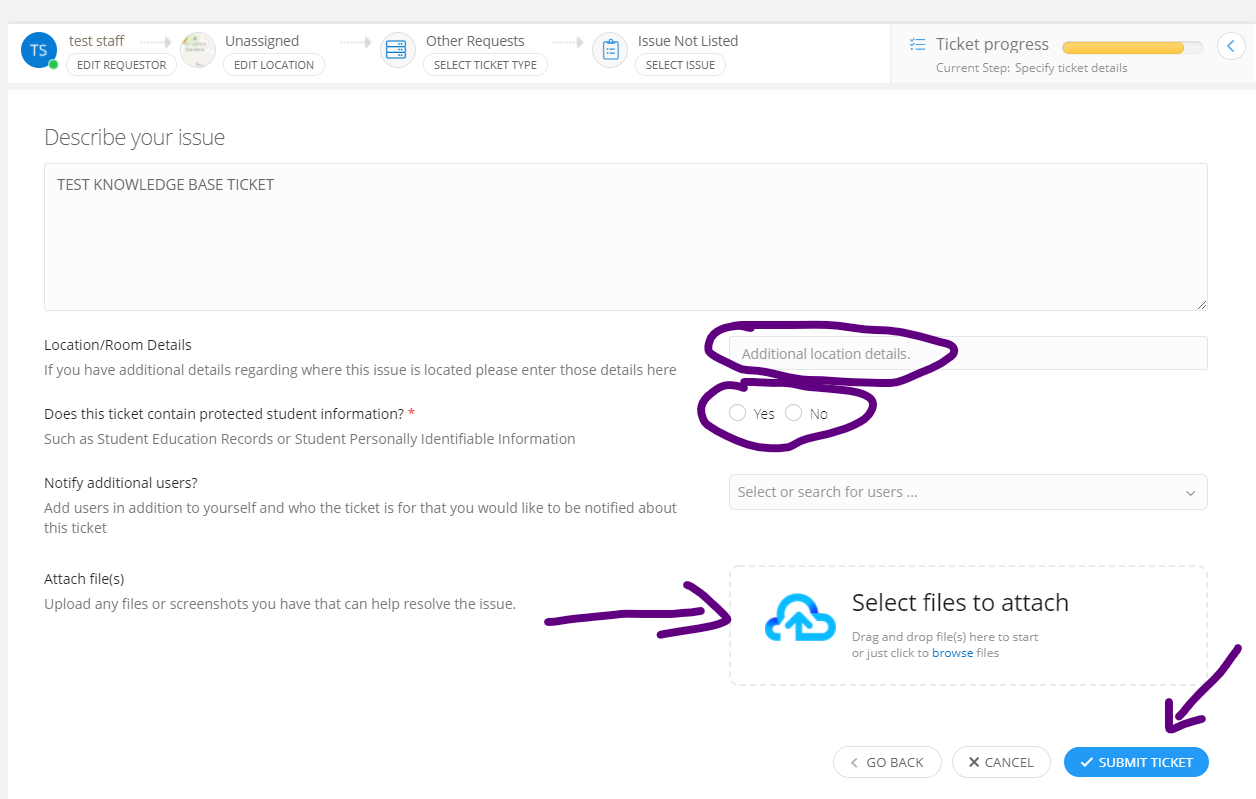
- By default, the location of the ticket will be set to your originally assigned location set by HR. The location can be seen at the top of the page
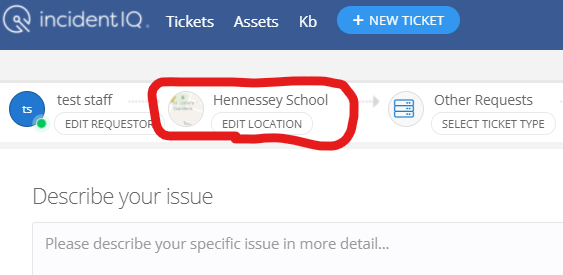
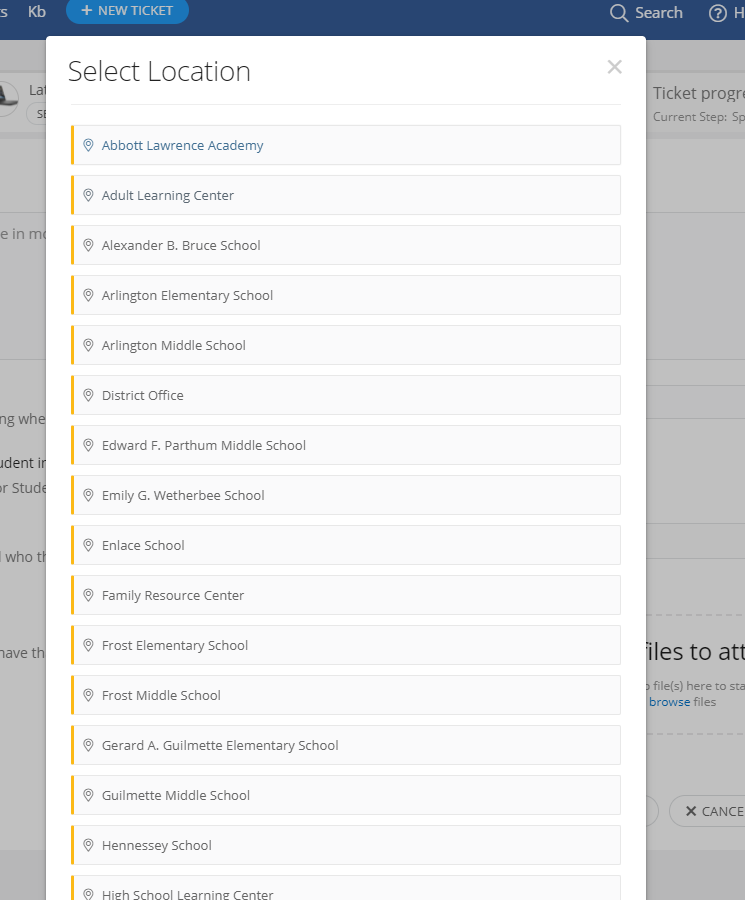
- If you would like to change the location click on "Edit Location" at the top of the page then select the location the issue or request is coming from.
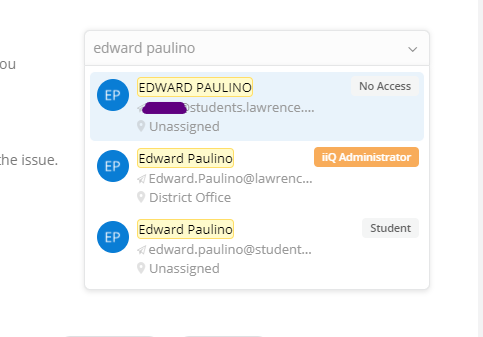
- If you want to include other staff members in the ticket click on the search box next to "Notify additional users?" to search for other LPS users. This will also enable email notifications of the ticket for the added users.
- Click "Submit Ticket" when you are done adding information to submit the ticket.

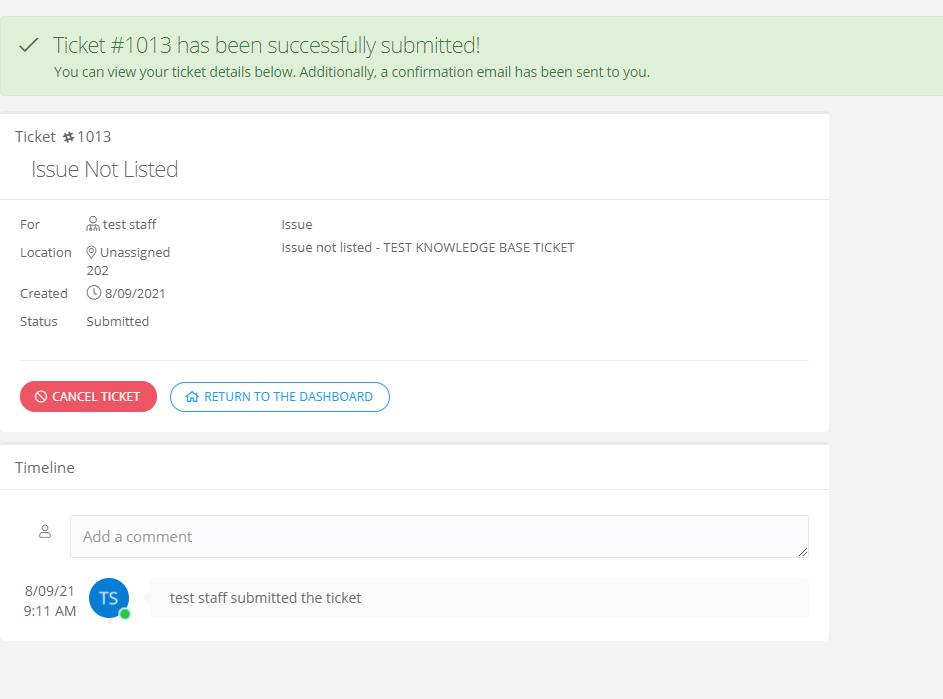
- After the ticket is submitted you can review the ticket as well as add additional comments if needed.
- Click "Return to the dashboard" to return to the main page. You can also click on "Cancel ticket" to cancel the current request.
Viewing ticket status
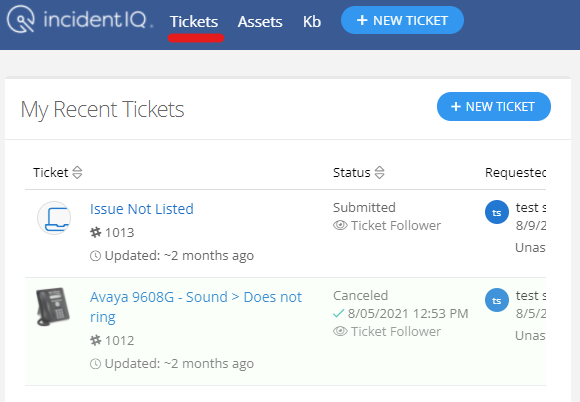
- Once logged in to the Incident IQ website you will have access to view any tickets that have either been created by you or have you added as a follower for notifications.
- The main dashboard that you will see upon logging in will display your most recent tickets.
- If you would like to get a more detailed listing, click on "Tickets" from the menu at the top of the page. This will also show you any ticket that are not directly assigned to you, but have you added as a follower for notifications.
 |
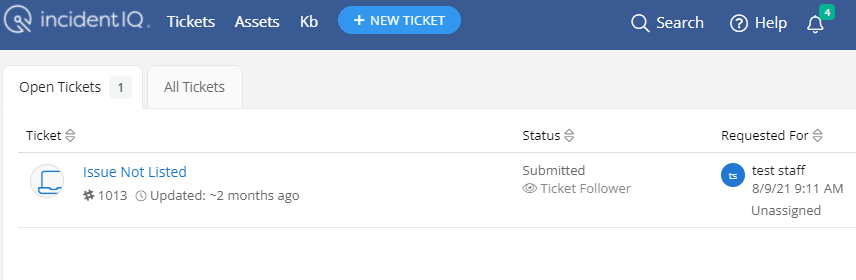 |
| Main Dashboard Page | View Tickets Page |
- Clicking on a ticket will open the "Ticket Detail" page for the selected ticket.

- This page will include the ticket status and all the information that was provided during the ticket creation process. This page will also include the ticket number you can use for reference when contacting the LPS Help Desk.
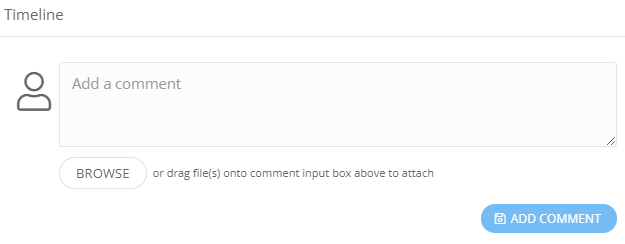
- The "Timeline" section at the bottom of the page can be used to add comments to the ticket. Comments added here will also be seen by the tech assigned to the ticket.
- Files or images can also be added to the comment.