How to update Windows OS via Software Center
Launching Software Center
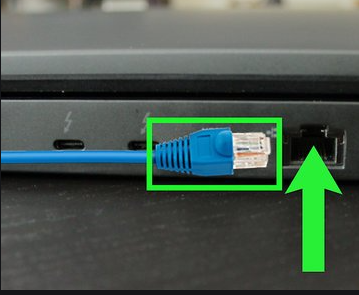
1. (Optional) If you are using a laptop: Insert an Ethernet cable into the network port on the laptop.
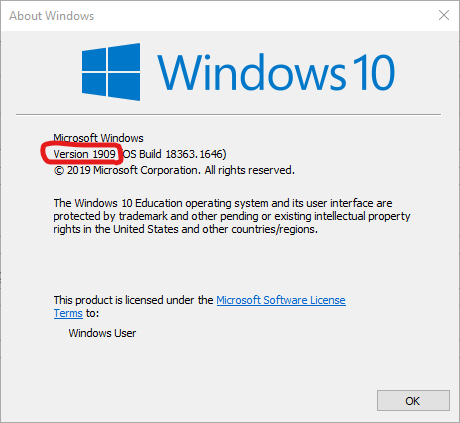
2. Click on the Start Menu (Windows icon at the bottom-left of the screen), then type "WINVER" on the search bar next to the start menu button.
![]()
3. A window will appear displaying the Windows version information. Note down the Windows OS version your device is currently running (either 1709,1809,1909, or 20H2).
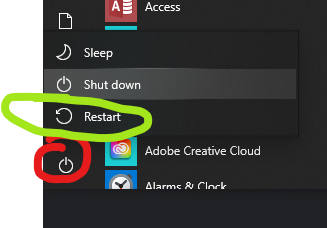
4. Restart the device while the Ethernet cable is plugged in (Choose the "Restart" option from the power menu).

5. After restarting, log back in to the device with your LPS account.
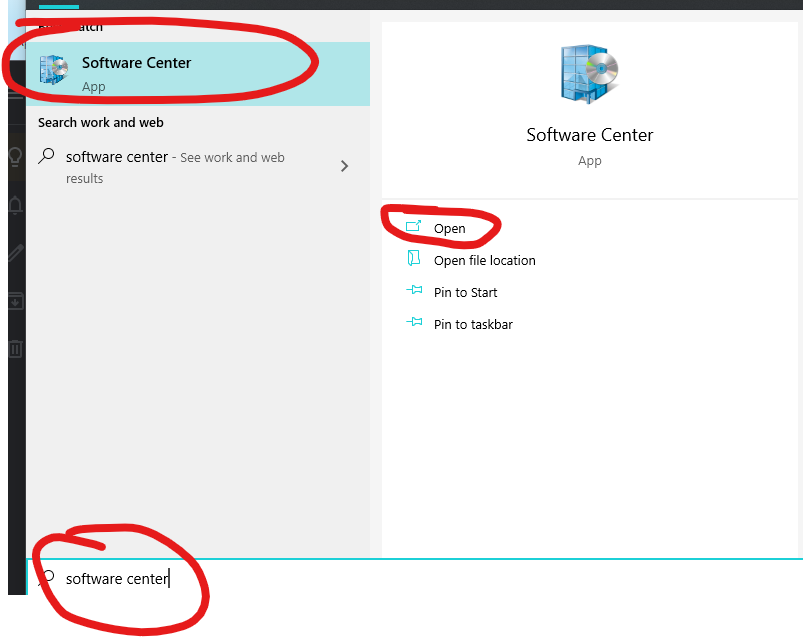
6. Click on the Start Menu and type "Software Center" into the search bar. The Software Center app should appear in the search results.
7. Click on Open in the search menu or press the enter key on your keyboard to open the Software Center app.
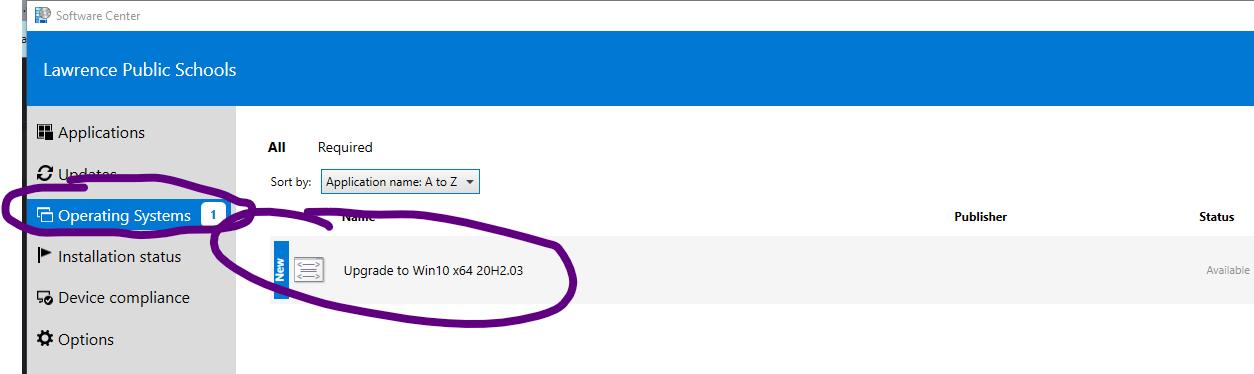
8. After the Software Center app loads click the "Operating Systems" tab on the left-hand menu,
9. In the Operating Systems screen click on the newest available update for your system (either 1709,1809,1909, or 20H2)
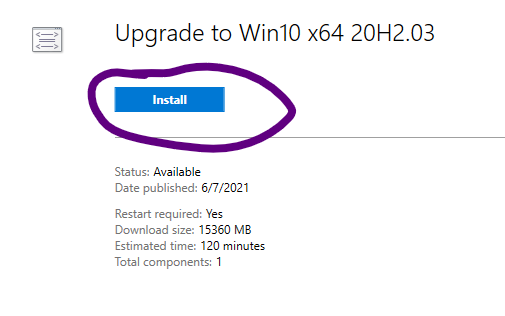
10. At the update install screen click the Install button.
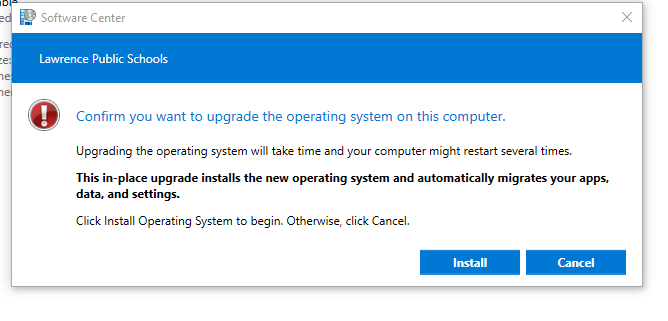
11. A warning pop-up will appear to notify you of the changes that will occur. Click the Install button on the pop-up window to begin the update.
12. The update will begin to take place. A pop-up window with a status bar will appear in your screen after a few minutes to indicate the progress of the update.
13. Once the update is complete you may log in with your LPS account and use your device as normal.